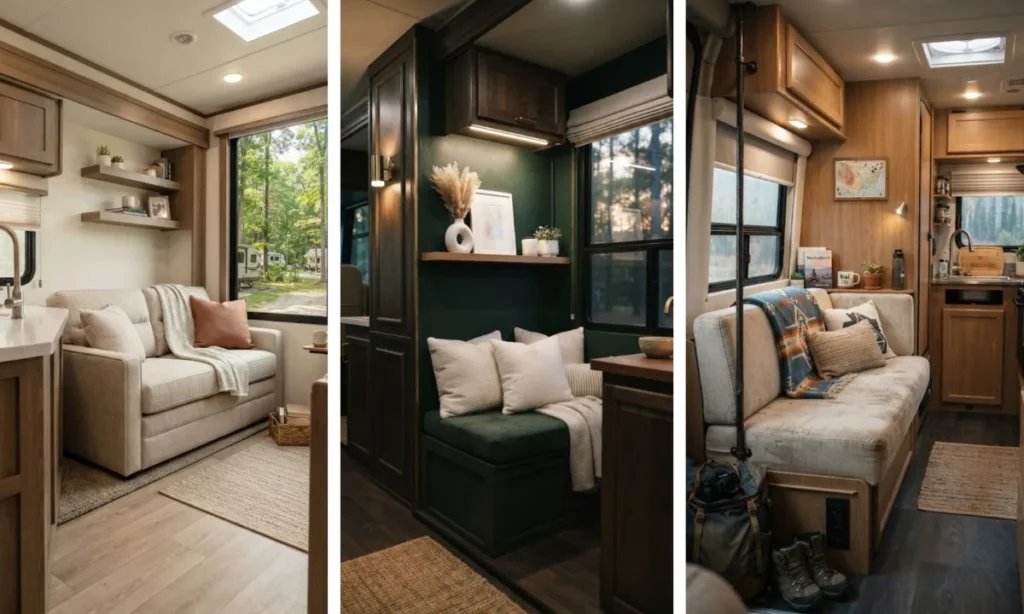
Most factory RV slide-outs feel like awkward, boxy add-ons. You stare at the weird carpet flap, the clunky side trim, and that stiff pleather jackknife sofa, wondering how to make it actually feel like part of your home. It is a common frustration for full-timers and weekenders alike. The square footage is there, but the residential comfort is missing.
If you want to stop feeling like you are sitting inside a vehicle, the trick is to blur the harsh lines where the slide-out meets the main floor. Small, deliberate changes make a massive difference. By swapping out bulky pieces, fixing the lighting, and adding soft textures, you can completely disguise the mechanics.
These RV slide-out decorating ideas bypass the generic factory look. We are skipping the expensive renovations and focusing on practical swaps you can pull off this weekend. Here are the exact steps to turn that awkward pop-out box into a genuinely cozy living area.
1. Swap Bulky Factory RV Furniture
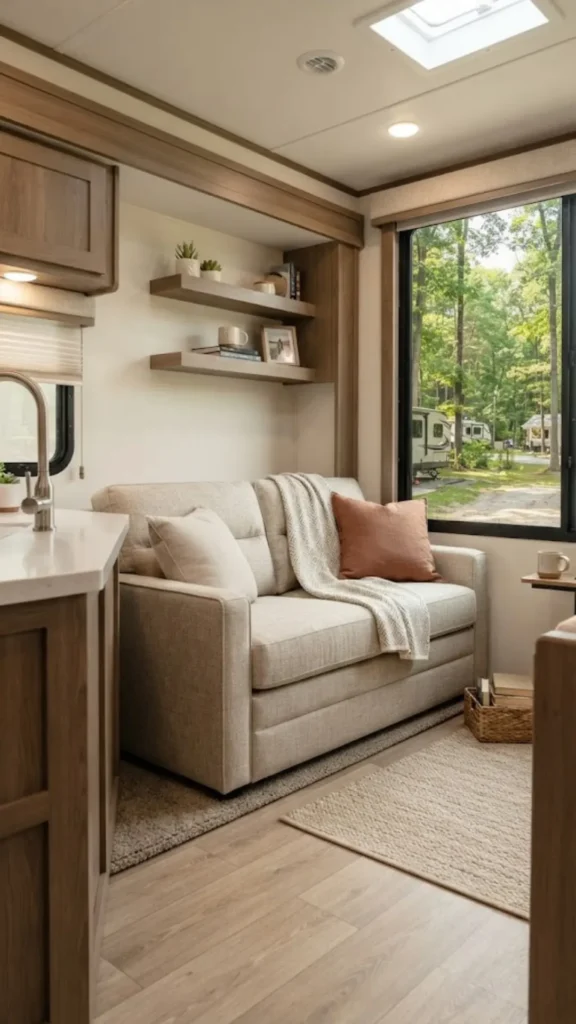
Pulling out the heavy, uncomfortable factory sleeper sofa makes a massive difference. The standard pieces waste precious floor space and usually look extremely dated.
Unbolt the brackets, carry the old rig pieces out the door, and measure your exact depth clearance. What to bring in instead:
If you want a curated shopping list instead of guessing, we rounded up compact RV furniture pieces that are built for exactly this kind of swap.
- A modular loveseat that ships in small boxes.
- Two slim, swivel-barrel chairs with a small side table.
- A lightweight residential futon with wooden legs.
| Factory RV Sofa | Residential Furniture |
|---|---|
| Heavy, bolted down, and limits movement. | Lightweight, movable, and easy to clean behind. |
| Stiff, peeling synthetic leather materials. | Soft, breathable, and comfortable fabrics. |
2. Add Battery-Powered Wall Sconces
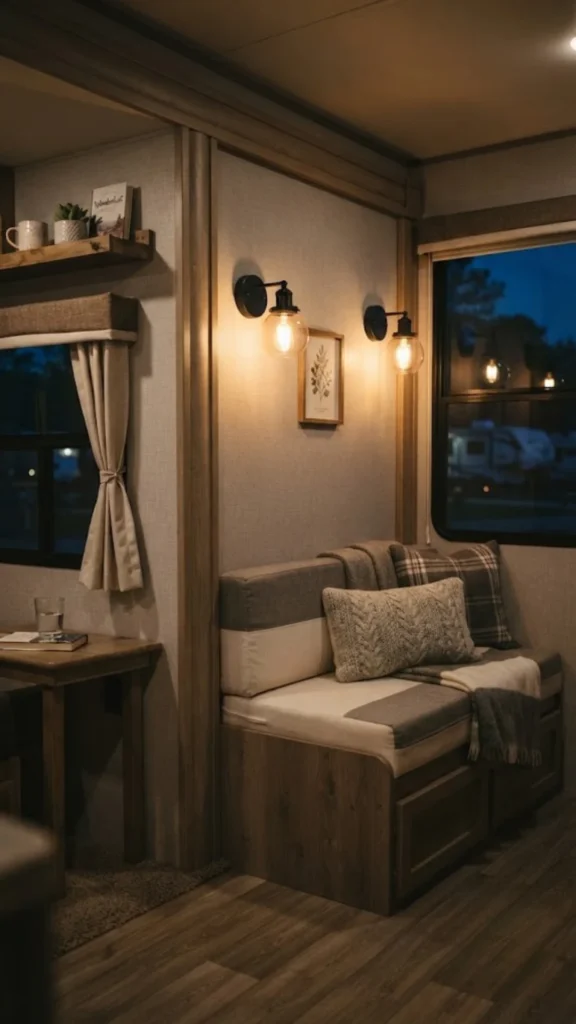
Getting warm, ambient light changes the entire mood of the camper at night.
Factory ceiling puck lights cast harsh, clinical shadows right where you want to relax. Hardwiring new fixtures into a slide wall is a massive headache because of the moving wires. Skip the electrical work entirely with these simple steps:
- Buy standard residential sconces.
- Mount them directly to the side walls of the slide-out.
- Leave the internal wires empty.
- Stick remote-controlled rechargeable LED pucks where the lightbulbs usually go.
3. Hang Curtains High And Wide
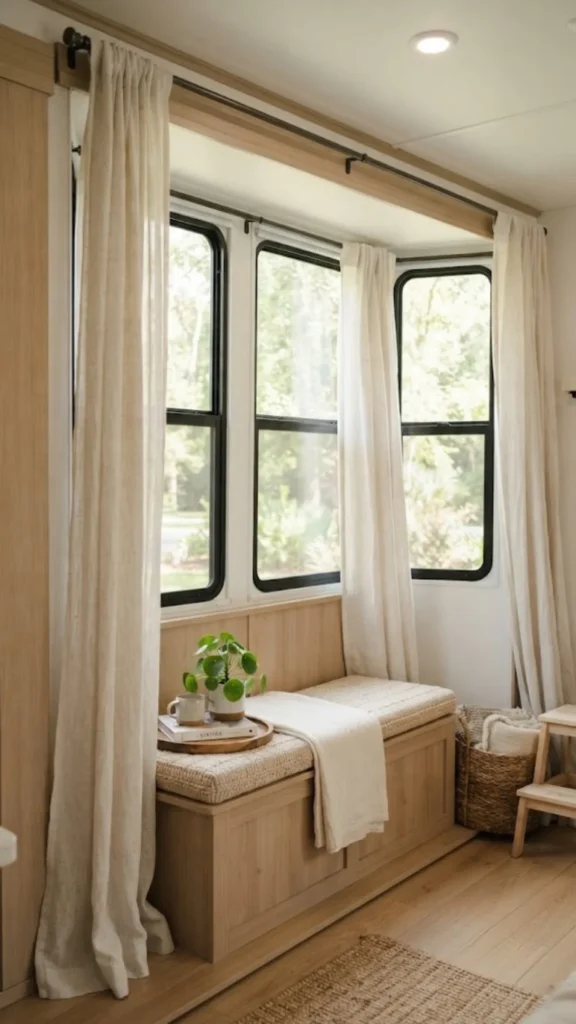
You sit down on the sofa, look up, and there are those stiff, patterned fabric valances framing the windows. Ripping them down and putting up real curtains immediately softens the entire wall.
Mount a slim tension rod or a lightweight ceiling-track system as close to the ceiling of the slide-out as possible. Let the fabric drape all the way to the floor. This draws the eye upward, making the low ceiling feel taller while successfully hiding the side trim of the slide box.
💡 Quick Tip
Stick to lightweight linen or sheer cotton fabrics. Heavy velvet or thick blackout curtains add unnecessary weight and can get trapped when pulling the slide in.
4. Install Lightweight Floating Ledges
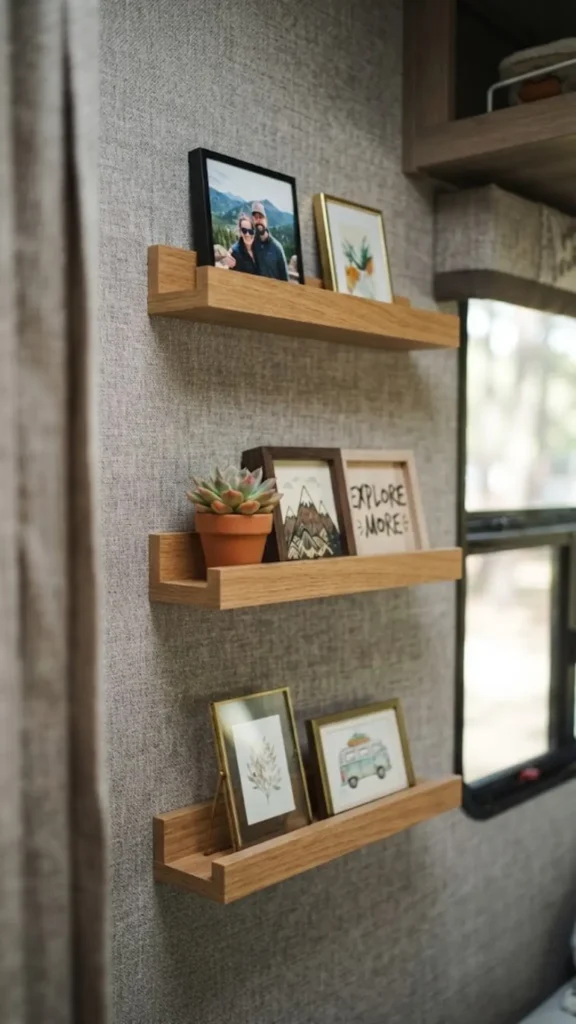
Many owners make the mistake of bolting deep, heavy shelves into their slide-out walls. Blank side walls do look sterile, but deep bookshelves eat up too much of your walking space and add dangerous weight to the slide motor.
Slim picture ledges are the perfect middle ground. They give you a spot to prop up small framed photos, travel postcards, or tiny trailing plants without intruding on your headroom. Pick hollow plastic or balsa wood ledges rather than heavy solid oak. Keep them shallow, using ledges no more than three inches deep.
Always use clear museum putty to stick your frames to the ledge so you do not have to pack them away on travel days.
5. Build A Custom Window Seat
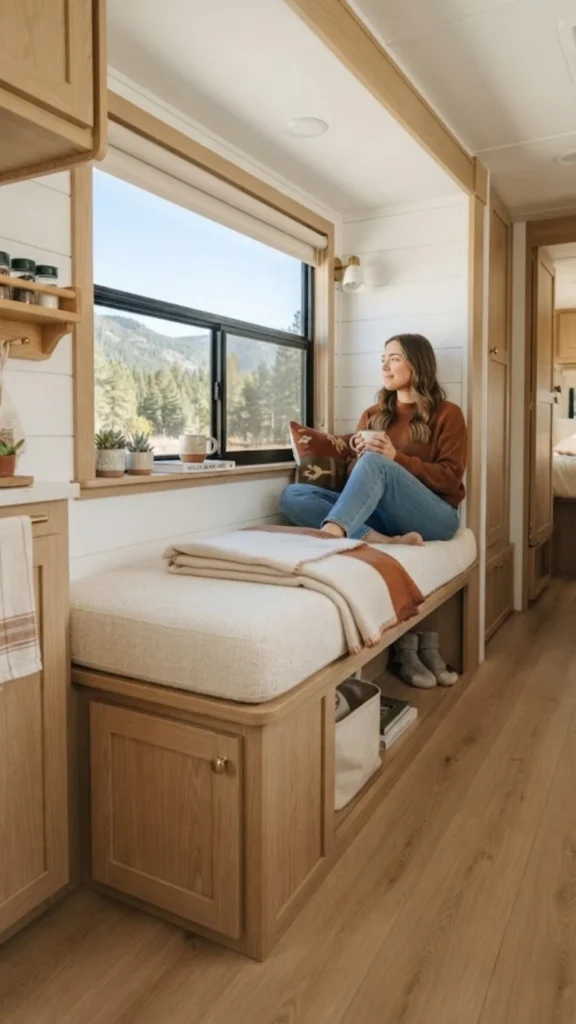
Removing the factory dinette leaves a huge empty gap under the main slide window.
A simple bench seat maximizes that spot while giving you massive hidden storage underneath. Instead of a heavy solid wood build, frame it out with lightweight lumber and a thin plywood top. You can store extra blankets, heavy winter gear, or bulky kitchen pots inside the bench, freeing up your main cabin cabinets.
For more on framing, fastening, and finishing built-ins like this one, our guide to building custom RV storage covers the process in detail.
Measure the clearance carefully so the bench does not scrape the main floor when the slide retracts.
Frame the hollow box using lightweight 1×2 pine boards to keep the overall weight low.
Top it with a custom cut foam cushion wrapped in durable, washable outdoor fabric.
6. Define With An Area Rug
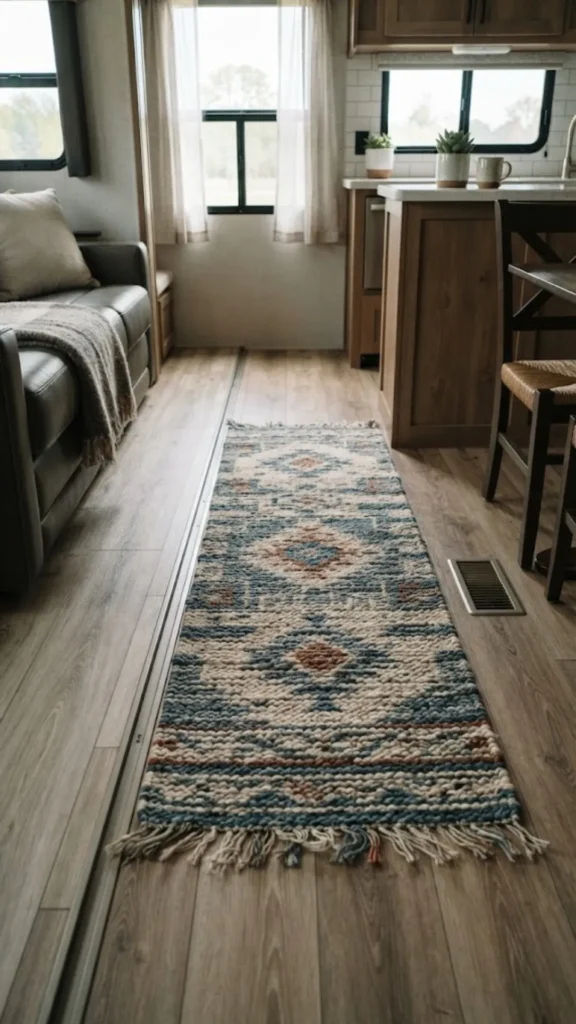
The lip where the slide floor meets the main cabin is usually a major eyesore.
Covering that transition line instantly grounds the space. Roll out a flatweave runner or a small rug that bridges the gap. Doing this hides the mechanical seam and pulls the room together.
Always choose a low-pile or washable rug. Anything too thick will get caught in the mechanism when you pack up on moving day. Use heavy-duty rug tape to keep the corners locked flat against the vinyl floor so nobody trips.
Staring at the awkward carpet flap and exposed slide mechanism that screams “I am sitting in a trailer.”
A smooth, unbroken floor line that tricks the eye and makes the whole area feel like a residential living room.
7. Use Peel And Stick Wallpaper
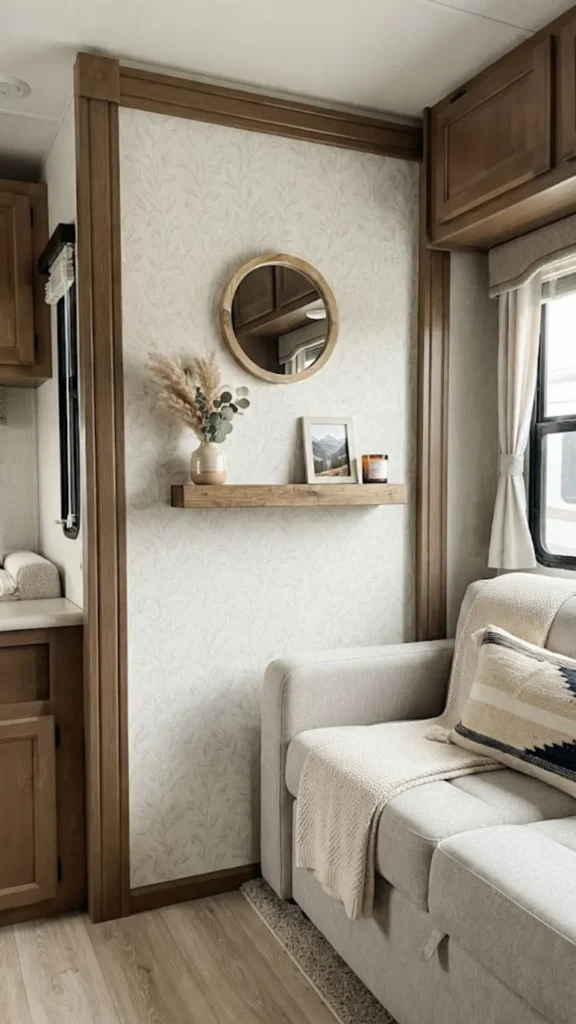
Wallpapering the back wall of the slide-out visually separates it from the rest of the camper. Creating this focal point tricks the brain into seeing a distinct room rather than just a bumped-out wall.
Keep the pattern scaled correctly. Huge floral prints look chaotic in a tiny space, while subtle grasscloth or thin stripes add texture without overwhelming the cabin. Always wipe the vinyl walls down with rubbing alcohol before applying the paper so it actually sticks through hot travel days. Our full guide to installing removable wallpaper in an RV walks through every step from prep to trimming the seams.”
Use lightweight vinyl peel and stick wallpaper.
Smooth out air bubbles with a plastic squeegee.
Never use traditional wet wallpaper paste in an RV.
Avoid hanging paper on the side walls where it rubs.
8. Create A Dedicated Dining Nook
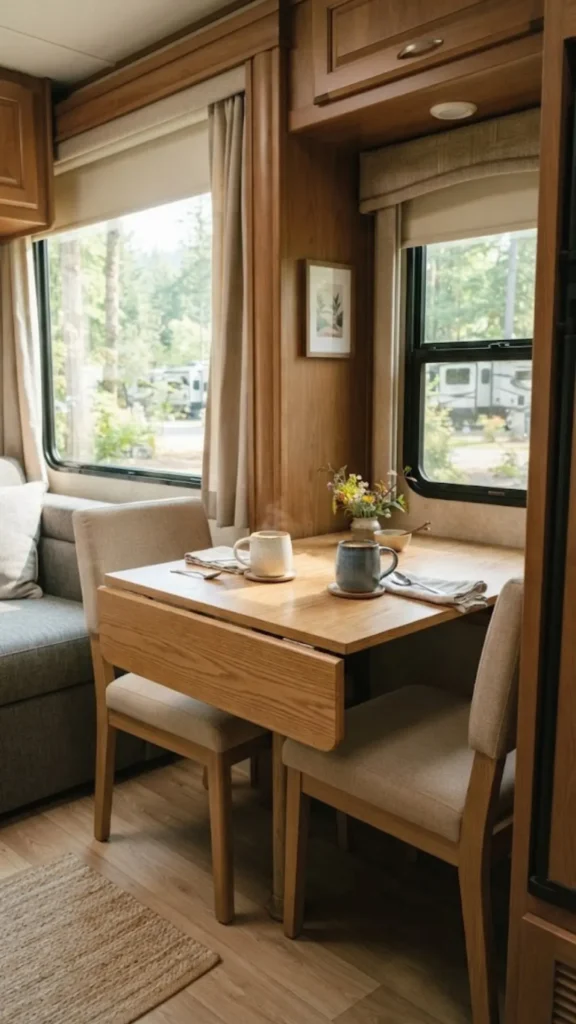
You do not need a massive built-in booth to enjoy meals in your rig.
Tuck a small drop-leaf table into one corner of the slide-out, the same style used in our guide to setting up a work-from-anywhere RV office, which doubles nicely as a laptop station when you’re not eating.
Paired with two folding chairs that stash away during transit, this setup gives you a proper place to eat or work without permanently blocking the walking path. On travel days, fold the leaves down and slide the table flush against the wall.
What to grab first
9. Soften Corners With Faux Plants
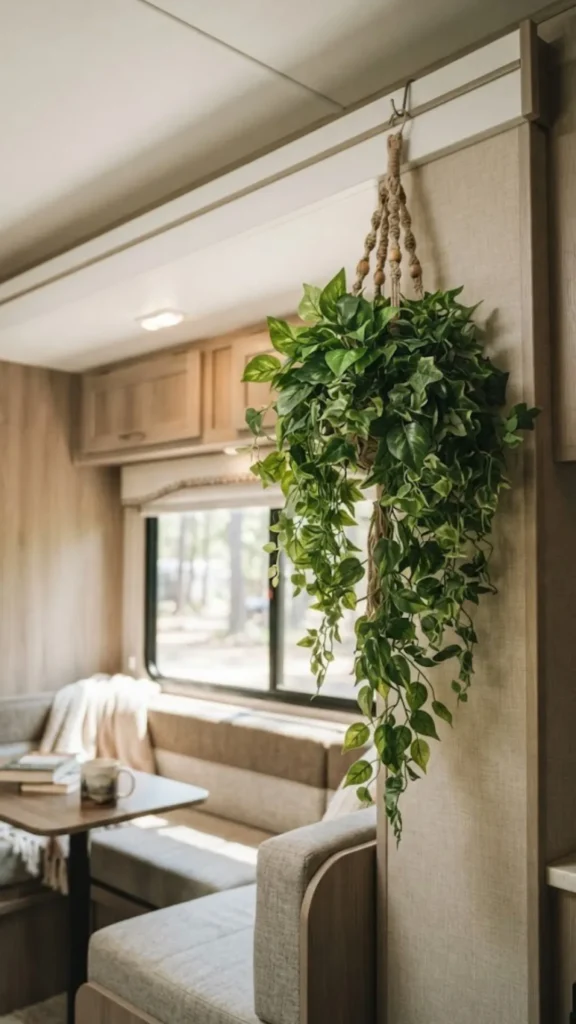
The sharp, right angles where the slide box meets the ceiling often highlight the mechanical nature of the room.
Tucking a trailing plant into that upper corner instantly softens the harsh geometry. Real plants hate the temperature swings of travel days, so high-quality fakes are your best friend here. Hang a lightweight plastic pot using a strong adhesive hook, and let the artificial vines drape down over the side trim to break up the boxy shape.
10. Hide Mechanisms With Wood Trim
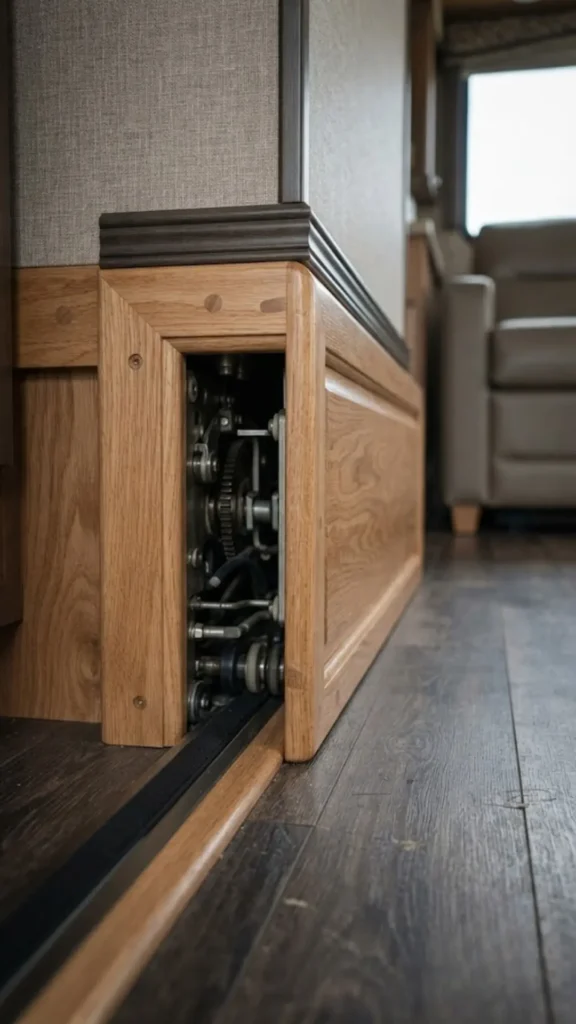
Many older rigs expose the ugly metal tracks or cables right on the side walls. Staring at greased gears makes relaxing difficult.
Measure the depth of the track and attach a lightweight piece of hollow pine trim over the channel using heavy-duty hook-and-loop fasteners. You get a finished, residential look, but you can pull the wood off in two seconds if you need to manually override the motor or grease the tracks.
📌 Good To Know
Always leave a quarter-inch gap between the bottom of your new trim and the main RV floor so the wood does not drag and scratch your flooring when the slide retracts.
11. Layer Cozy Textured Throw Blankets
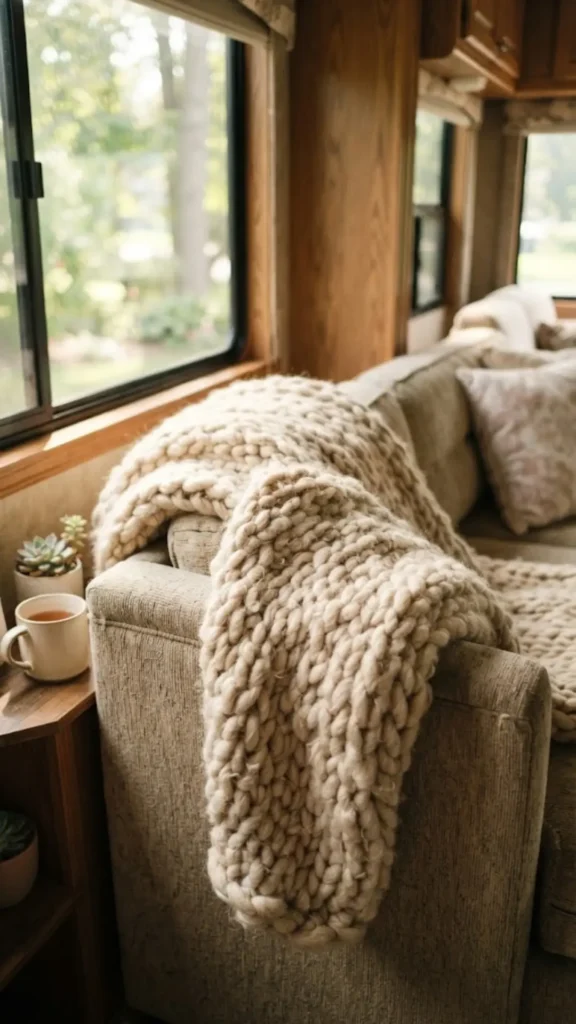
Sitting on synthetic factory upholstery gets uncomfortable quickly, especially in humid weather.
If you are not ready to toss the existing sofa just yet, draping a chunky knit or waffle weave blanket over the back hides the shiny vinyl. Mixing soft textures breaks up the flat, boxy look of the slide-out and adds immediate warmth to the room. Drape them casually over the arms or fold them neatly across the back cushions.
12. Pick Multifunctional Storage Ottomans
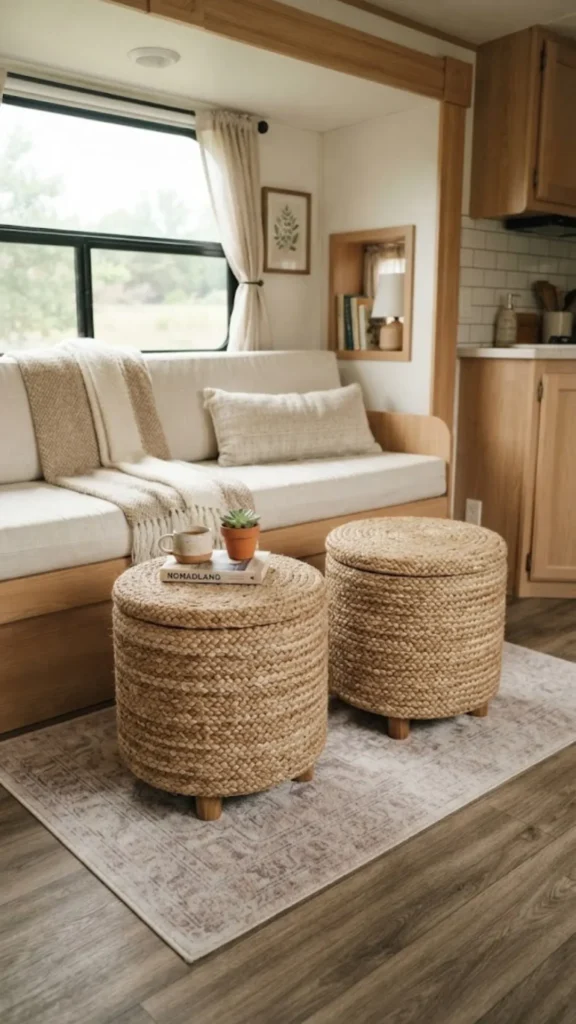
A heavy wooden coffee table is a terrible idea for a camper because it slides around on moving days and takes up valuable walking room.
You still need a spot to put your feet up or set down a coffee mug. A set of two small storage ottomans solves the problem perfectly.
If storage ottomans work for your slide-out, they’re just the start — check out more clever RV storage ideas for hiding clutter in every corner of the rig
- Flip the lids to use the hardwood underside as a drink tray.
- Keep laptop chargers and books inside.
- Push them out of the way when the slide comes in.
| Standard Coffee Table | Storage Ottomans |
|---|---|
| Blocks the main walking path. | Lightweight and easy to tuck in a corner. |
| Scratches the vinyl floor during transit. | Soft bottoms slide safely over flooring. |
13. Mount Light Reflecting Acrylic Mirrors
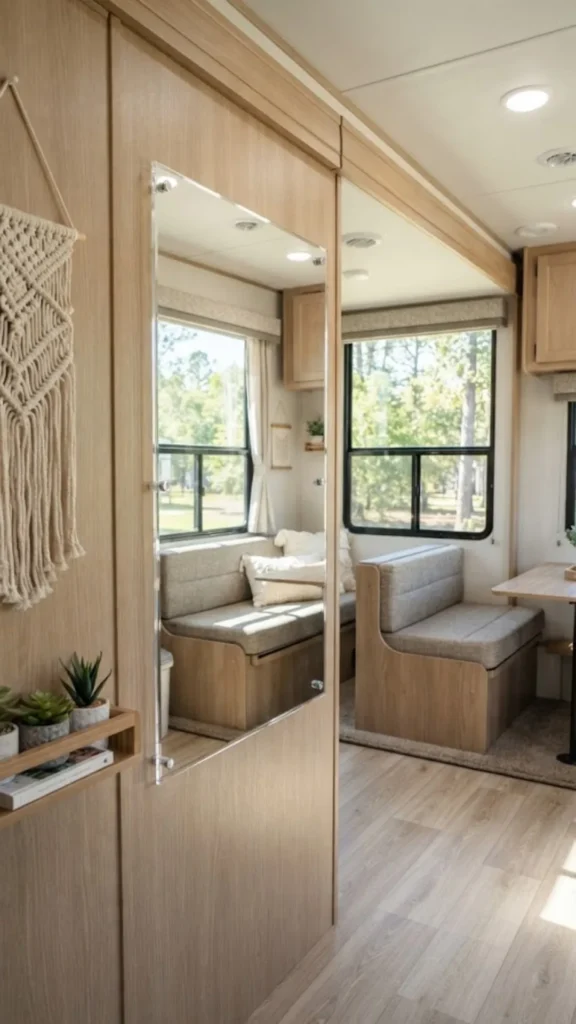
Slide-outs often feel like dark caves if the side windows are small. Hanging a large mirror on the back wall bounces natural sunlight around the room and makes the shallow depth feel twice as large.
This is one piece of a bigger strategy; see our full breakdown of how to make an RV feel bigger for more ways to open up tight spaces.
Do not hang a heavy glass mirror in a moving vehicle. Buy a sheet of mirrored acrylic online. It looks exactly like real glass, but it is shatterproof and weighs almost nothing. You can attach it directly to the camper wall using strong double-sided mounting tape.
A dark, shallow bump-out that feels closed off from the rest of the camper.
A bright, airy nook that reflects the outdoors and opens up the visual space.
14. Paint The Slide Out Dark
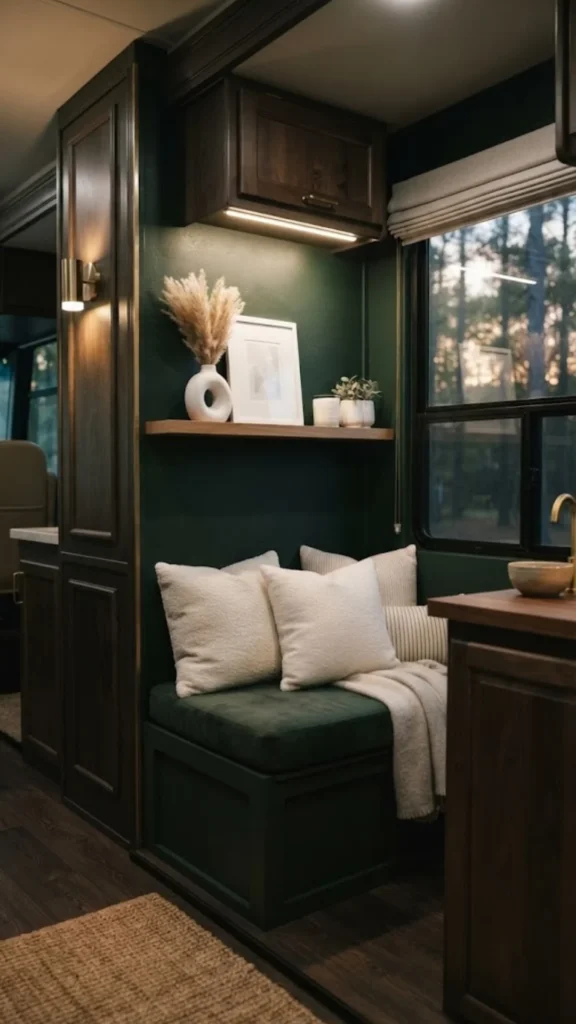
Most RV interiors are a wash of identical beige or faux wood paneling.
Painting the inside walls of the slide-out a deep, moody accent color changes the entire architecture of the rig. Dark greens, navy blues, or warm charcoals make the walls recede.
This simple trick turns an awkward mechanical box into an intentional, cozy alcove. Clean the walls with a degreaser and use a high-adhesion bonding primer before rolling on your color.
💡 Quick Tip
Paint the ceiling of the slide-out a crisp white to maintain headroom, keeping the dark accent color strictly on the walls.
15. Install Residential Window Roller Shades
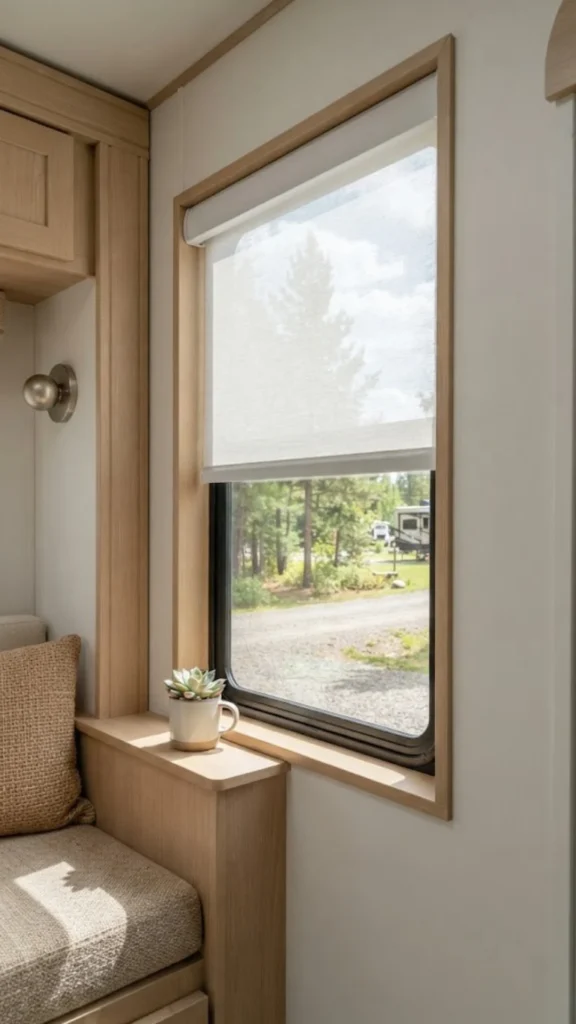
Those factory pleated day and night shades collect dust, break strings constantly, and scream “camper interior.”
Unscrew the factory valances and take those accordion shades down. Replace them with clean, cordless residential roller shades. They offer better blackout coverage for sleeping, look completely modern, and easily fit within the shallow depth of the slide-out window frames without getting caught in the machinery.
Make sure your new roller shades have a locking mechanism or use a bottom tie-down so they do not bang against the walls while you drive.
16. Anchor Furniture With Tension Rods
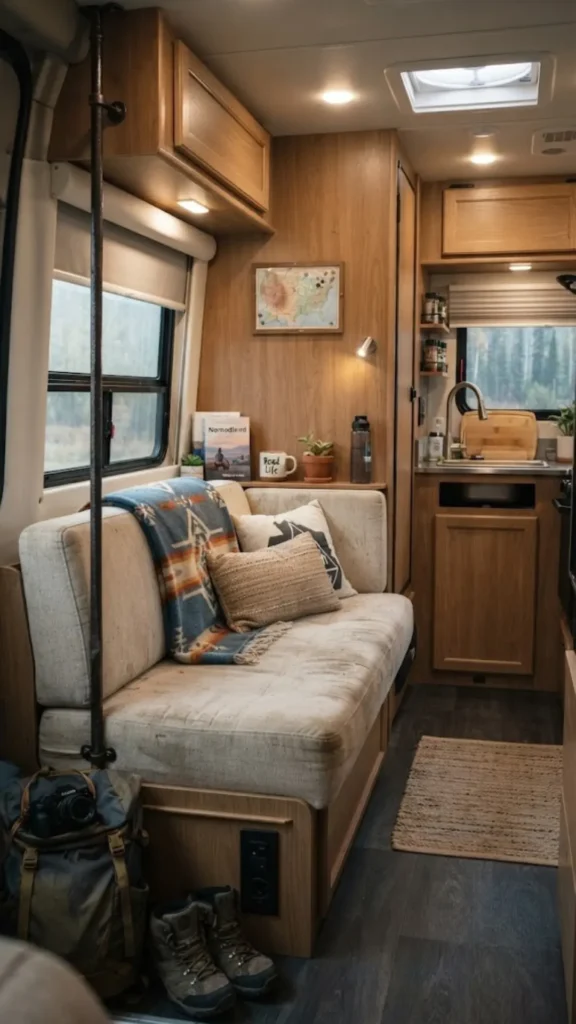
After you pull out the factory-bolted sofa and bring in residential pieces, you face a new problem: your furniture will slide around on the vinyl floor while you drive.
You do not need to drill holes into your floor to fix this. Heavy-duty tension rods are the easiest solution. Place a sturdy rod between the wall and the back of your chairs or sofa to lock them against the sliding wall. When you arrive at your campsite, just unclip the rod and tuck it in a drawer.
Measure the distance from the sofa back to the slide wall.
Buy a tension rod capable of holding at least 50 pounds.
Wrap the rod ends in soft felt to protect your walls from scuffs.
17. Slide A Slim Console Behind
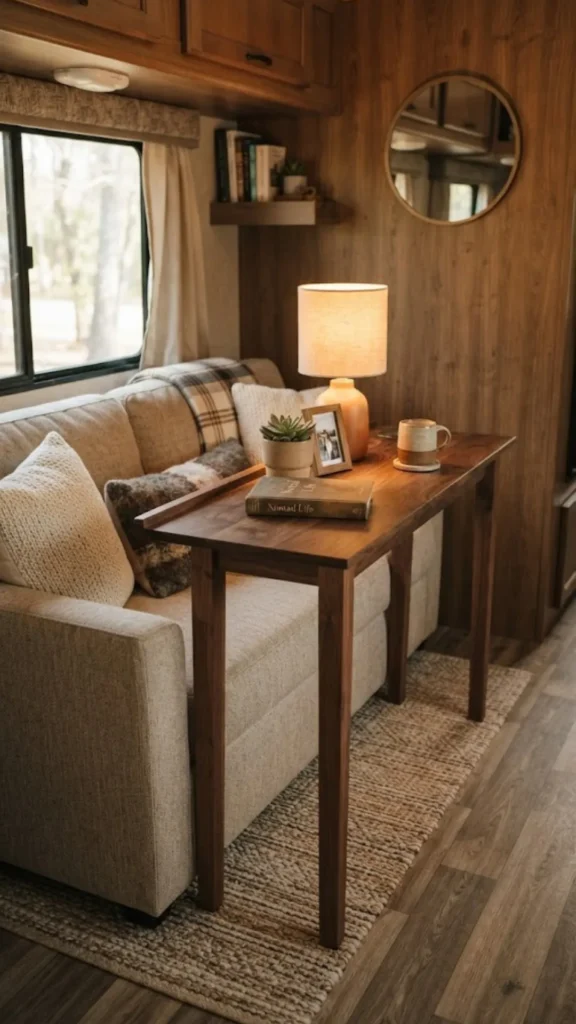
There is almost always a gap between the back of your new residential sofa and the slide wall. Do not let that space go to waste.
Slide a very narrow console table behind the sofa. It gives you a surface for a lamp, books, or a cup of coffee, and it provides a hidden place to store power strips and cables. Just make sure the console height is slightly lower than your sofa back so it stays tucked out of sight while you are sitting down.
18. Lay Seamless Interlocking Floor Tiles
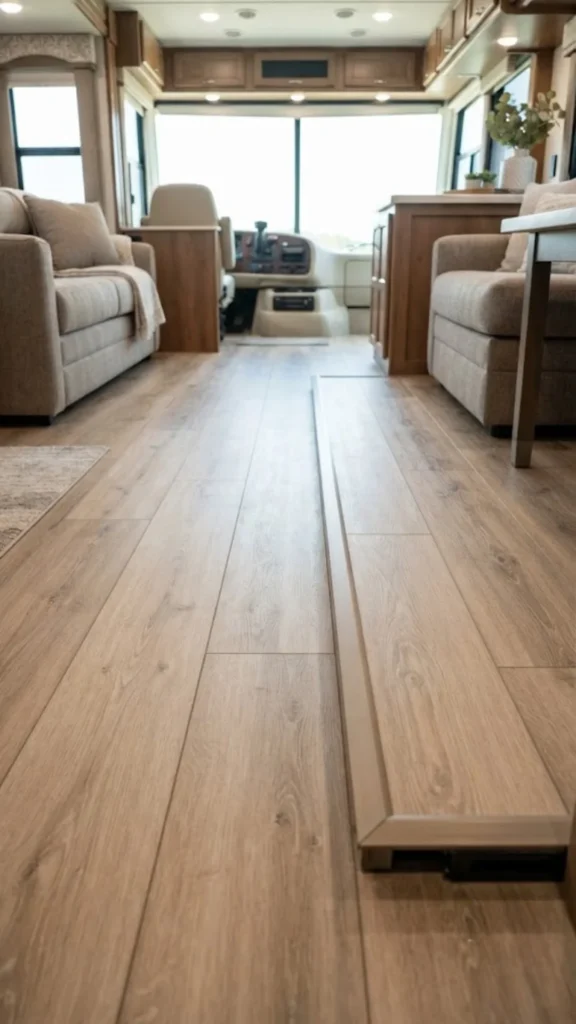
Most RV slide-outs come with a different, often cheaper, linoleum than the rest of the rig. Replacing the entire floor is a nightmare, but you can hide that mismatched surface with floating floor tiles.
Look for lightweight, interlocking vinyl planks designed for campers. They do not need glue or heavy subfloors. You simply click them together right over your existing floor.
Since they are light, they will not weigh down your slide motor, and they give you a seamless wood look that unifies the slide with the rest of your home.
Checklist for flooring
Make It Feel Like Home
You do not have to accept the boxy, sterile look of a factory RV interior. By using these RV slide-out decorating ideas, you move away from the “vehicle” feel and toward a space that actually functions like a living room.
Whether you start with just a rug and some warm lighting or go all in with new furniture and flooring, every small change builds up to a cozier home on the road. Take it one weekend at a time, focus on the details that annoy you the most, and enjoy the process of making your space truly yours.
If your slide-out is just one piece of a bigger refresh, our small RV living room decor ideas cover the rest of the space with the same practical, weight-conscious approach
Save this list for the next time you want to refresh your interior.