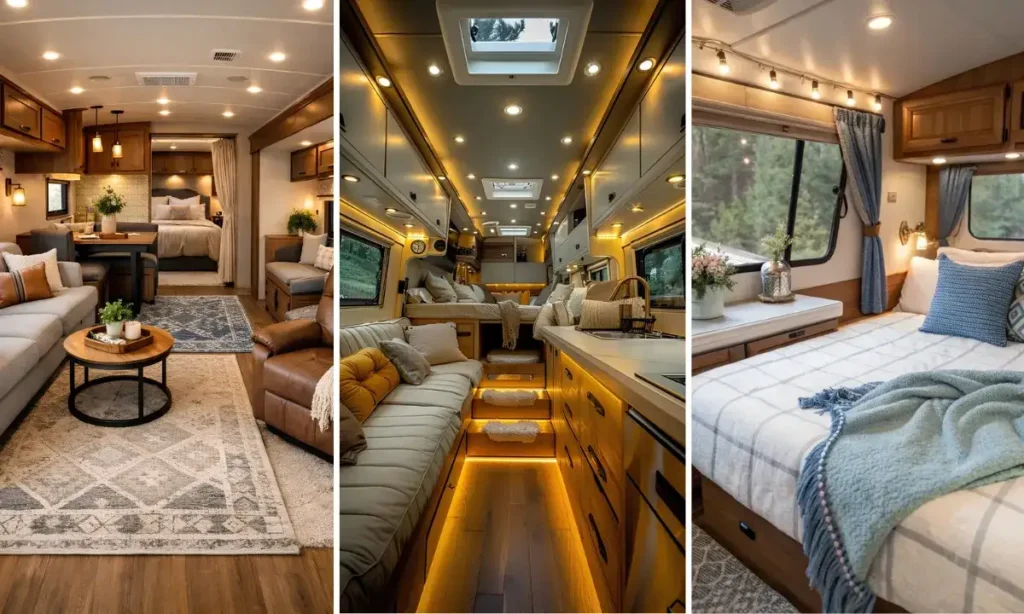
Most RV interiors rely on one overhead light and call it done, which is exactly why so many rigs feel dim and uninviting after sunset.
The fix isn’t more brightness. It’s more sources, each one doing a single job well instead of one fixture trying to do everything.
These fifteen RV lighting decor ideas show practical ways to solve that problem, from toe-kick strips that light a midnight walk to the coast, to woven pendants that soften a harsh bulb, to skylights that cut lamp use before a single switch gets flipped.
Some ideas cost nothing but a battery lantern. Others involve mounting something permanent.
All of them share the same goal: light that matches how the space actually gets used, not just how it looks in a photo.
1. Stack Three Layers Of Light
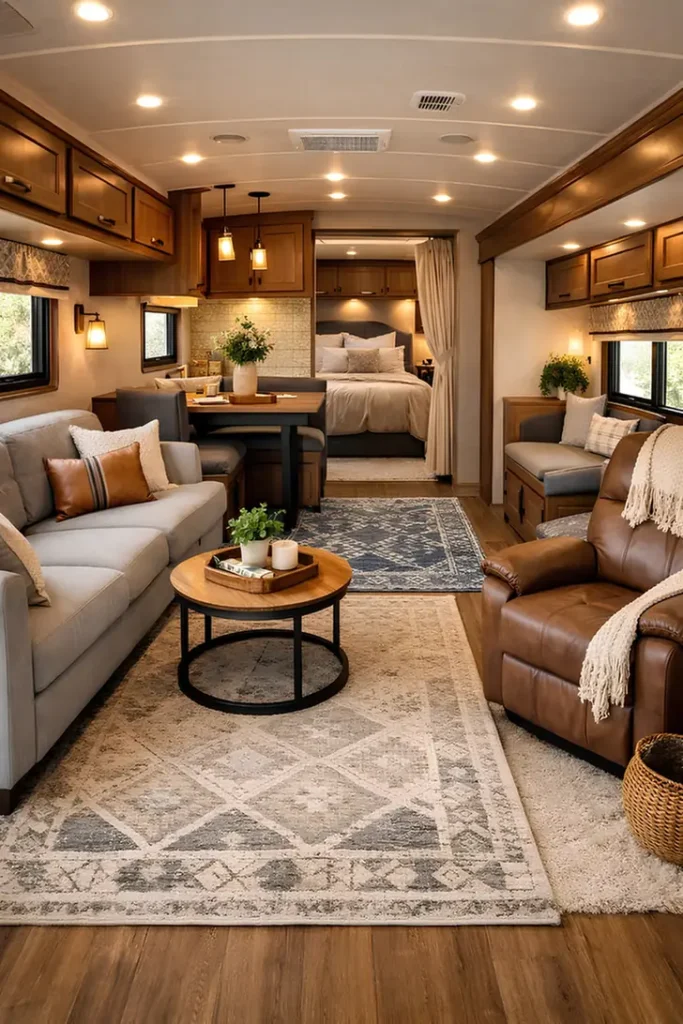
One overhead light source is why most RVs feel flat and clinical.
This rig fixes it by stacking three fixture types at three different heights instead.
Recessed can lights handle ambient brightness across the whole ceiling. Two amber pendants drop low over the dining nook, marking it off as its own zone. A single wall sconce near the window adds a warm pool of light without needing another switch.
The payoff:
▸ No flat, single-source glare
▸ Distinct zones for eating and lounging
▸ A rig that reads warm even after dark
2. String Lights Along The Ceiling Track
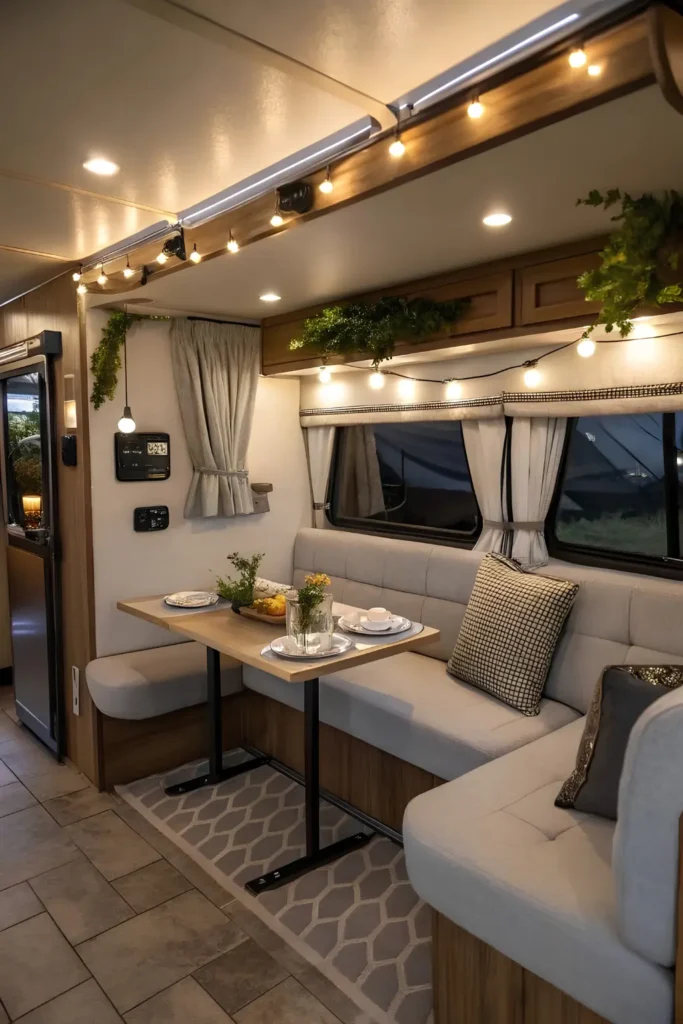
Café-style string lights running along a ceiling track do more work than any single fixture could.
They trace the whole seating and dining area in one continuous line, so the glow follows the shape of the room instead of pooling in one spot.
A few things make this one work so well:
- Warm bulb tone instead of stark white
- Trailing greenery tucked around the wire to soften the hardware
- Low placement that lights faces at the table, not just the ceiling
The catch is upkeep. String lights on a moving rig can rattle loose over time, so an occasional check of the clips keeps the line from sagging on the road.
Clip-on battery string lights along any existing curtain rod or trim edge, no tools needed.
Hardwired track lighting with a dedicated dimmer switch, run along a custom wood valance.
3. Let Skylights Double As Fixtures
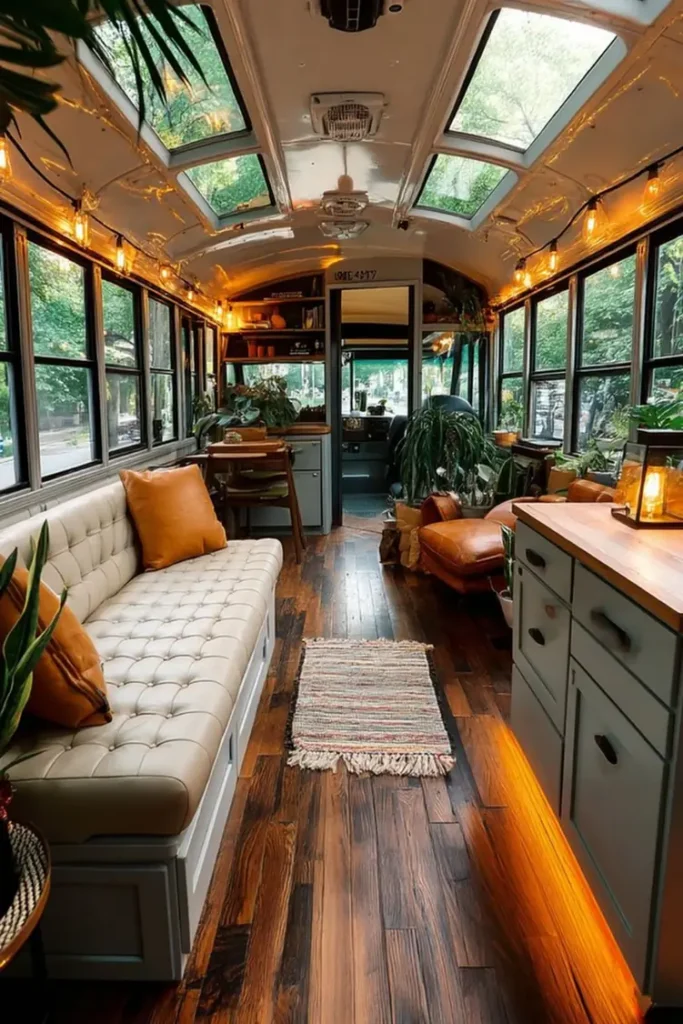
Not every light source needs a switch.
The skylights running down this rig’s roofline pull in daylight all day, which cuts down on how many lamps have to work during daytime hours.
Once the sun drops, string lights along both window rows pick up the slack and keep the same warm tone going into evening.
The two systems never fight each other because they run on different clocks. Natural light does the daytime job. Warm bulbs take over exactly when it’s needed, at dusk.
It’s a good reminder that not every fixture has to plug in. Sometimes the best light source is just a bigger window.
Daylight first, warm bulbs second
Skylights or extra windows cut lamp use in half before you even add a fixture.
4. Add A Bedside Reading Light
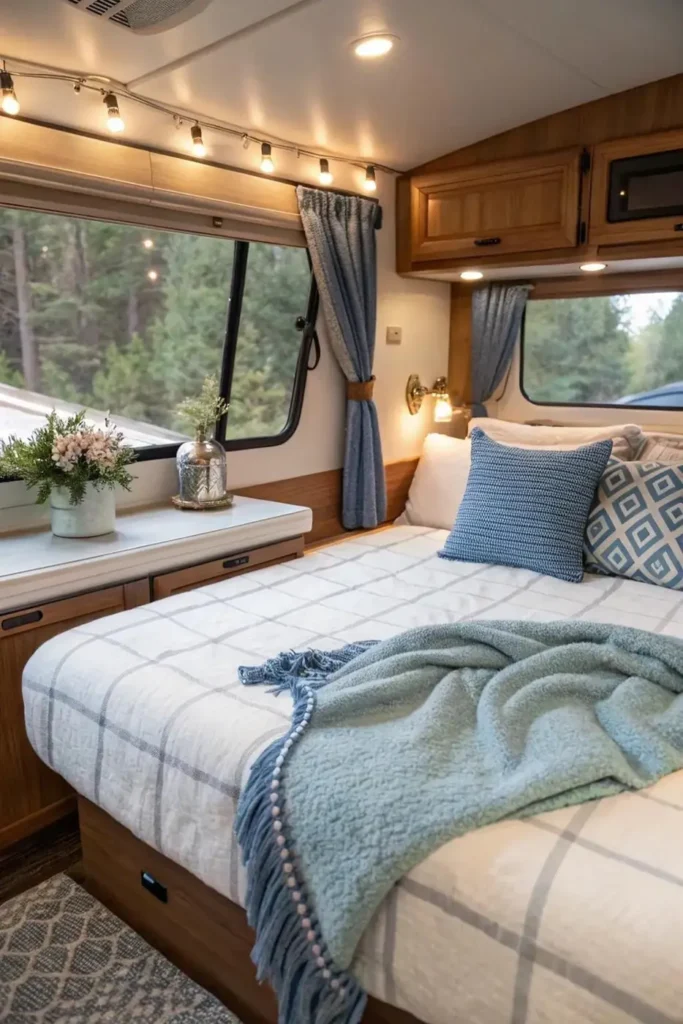
Most RV bedrooms rely on one dim overhead light and call it done.
That works for finding your way to bed. It does nothing for the person who actually wants to read before falling asleep.
A small brass sconce mounted right at pillow height solves this without adding another lamp to the nightstand. It throws light exactly where a book or phone screen needs it, and it stays off the tight surface where a vase or water glass already lives.
String lights along the window trim add ambient warmth for the rest of the room. The sconce is there for one job only, and it does it well.
5. Scatter Battery Lanterns Everywhere
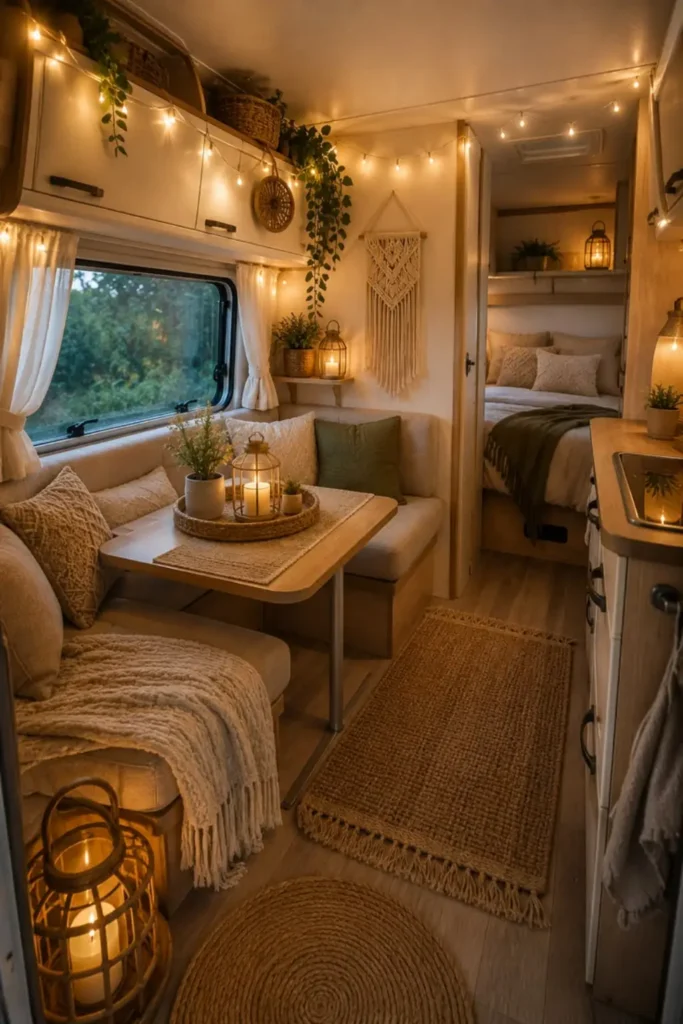
Wiring in a new fixture takes tools, time, and usually a trip to the hardware store.
Battery lanterns skip all three steps entirely.
This nook uses them on nearly every surface: one on the dining table, one tucked on a shelf near the window, one glowing on the floor by the bench. None of them are plugged into anything. Move them to the bedroom for reading, set them outside for dinner, or cluster them together when guests come over.
The tradeoff is upkeep. Batteries die at the worst possible moment, so keeping a spare set in a drawer saves a dark scramble later.
6. Run String Lights Along Beams
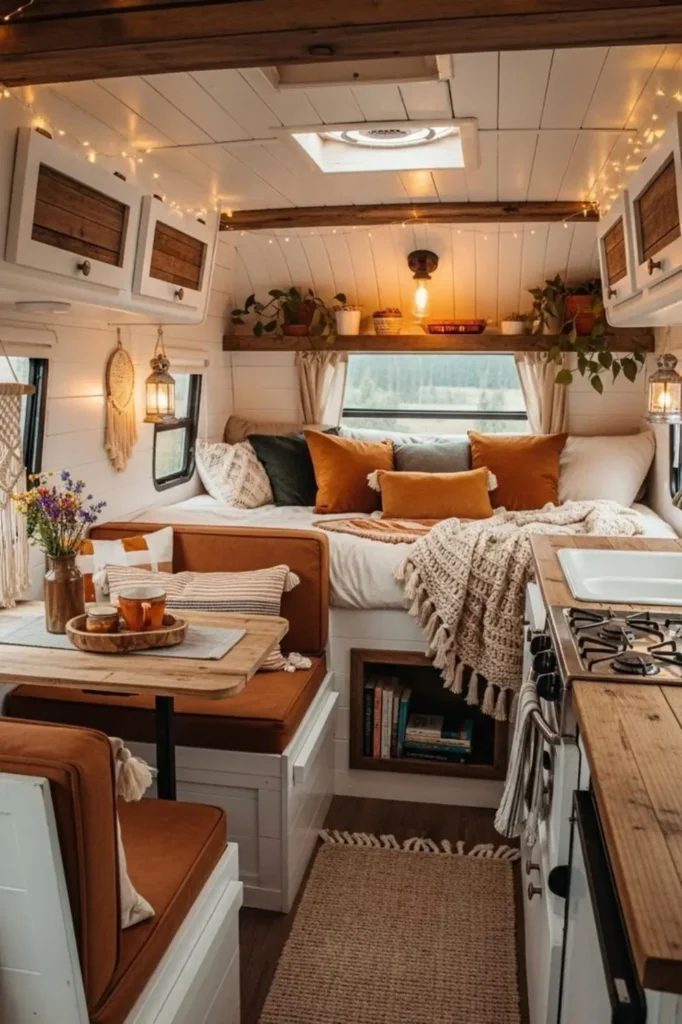
Exposed wood beams look decorative, but they double as an easy mounting surface for lighting.
Most people assume string lights need a track or a drilled anchor point. They don’t. A simple staple or adhesive clip along the beam edge holds the wire in place without touching the RV’s actual wall panel, which matters on a rig where every drilled hole is one less spot for water to get in later.
The result runs the full length of the ceiling in one continuous warm line, with a single pendant bulb breaking up the run over the kitchen shelf.
▸ Beam width, so clips sit flush without gaps.
▸ Wire length against the full ceiling run.
▸ Weight rating if adding hanging lanterns too.
7. Mount A Dual Sconce Above The Mirror
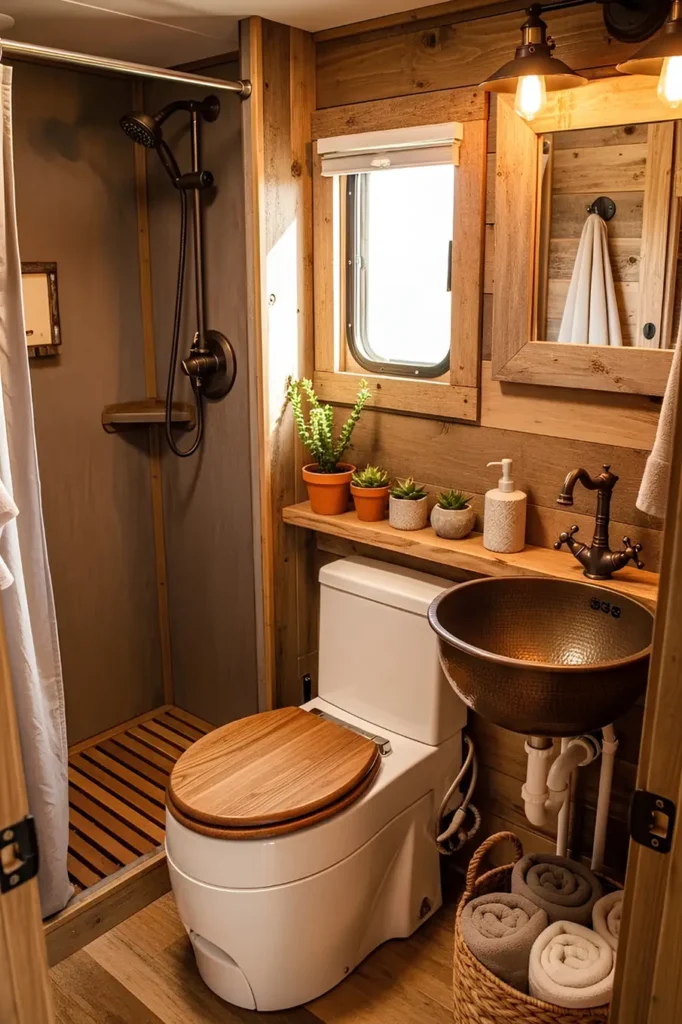
A bathroom this small can’t afford a light source that only half works.
The dual sconce above the mirror solves the two biggest bathroom lighting complaints at once. Task light for shaving or makeup, and enough spread to fill the whole shower and vanity corner without a second fixture.
Exposed bulbs matter here too. They read as intentional and a little industrial, which suits the reclaimed wood paneling instead of fighting it. A frosted or caged bulb would have softened the look into something more generic.
One thing worth knowing: exposed bulbs run hotter and show water spots faster in a steamy bathroom, so a quick wipe now and then keeps them looking sharp.
8. Pick A Woven Pendant Over A Bare One
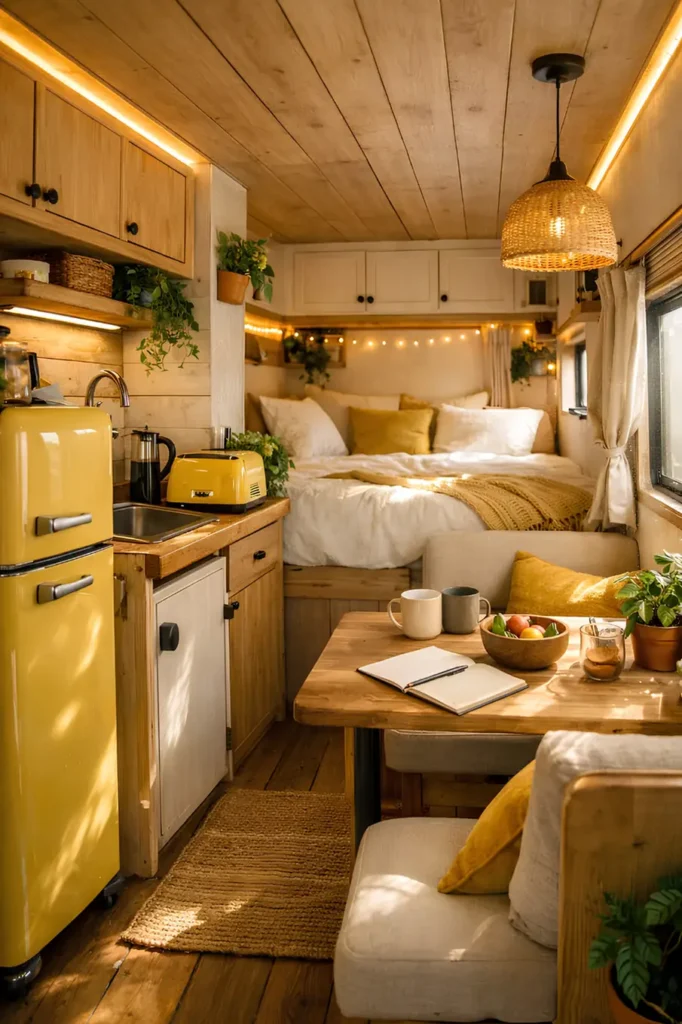
A wicker pendant does something a plain glass fixture never could here: it filters the light instead of just casting it.
The shade breaks the bulb’s glow into soft, dappled patches across the kitchen ceiling, which reads warmer than a direct beam even at the same wattage.
Underneath it, a thin LED strip runs along the underside of the upper cabinets. That’s the true workhorse. Chopping vegetables or pouring coffee happens in that strip’s light, not the pendant’s, since a hanging fixture alone always leaves a shadow right where the counter needs it most.
Two light jobs, two different fixtures, and neither one has to compromise.
A shaded pendant sets the mood. A hidden LED strip does the actual work below it.
9. Add Toe-Kick Lighting Under Cabinets
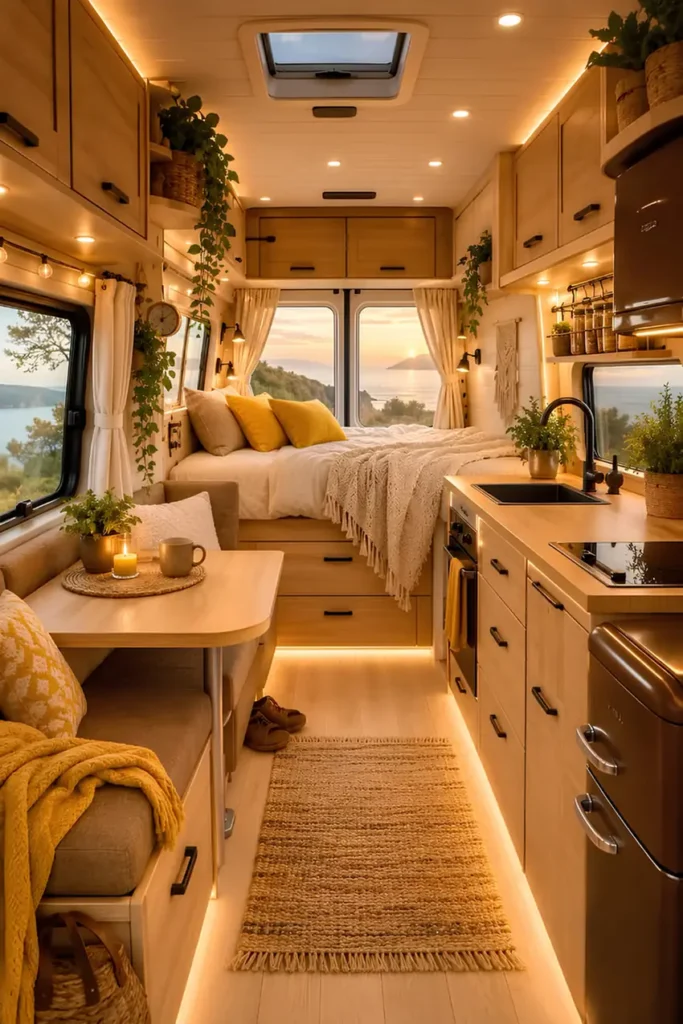
Recessed ceiling lights and warm sconces cover most of this rig already.
The floor is where it falls apart at night.
A thin LED strip tucked into the toe-kick beneath the lower cabinets fixes exactly that. It throws just enough light to find the bathroom or grab water without flipping on the overheads and waking anyone else up.
It also does something visual nobody expects: the whole lower cabinet run looks like it’s floating a few inches off the ground once the strip is lit.
Overhead lights are too bright for a 2am trip across the rig.
Motion-triggered LED strip installed inside the cabinet toe-kick.
Everyone stays half asleep, and nobody stubs a toe getting there.
10. Weave String Lights Into Garland
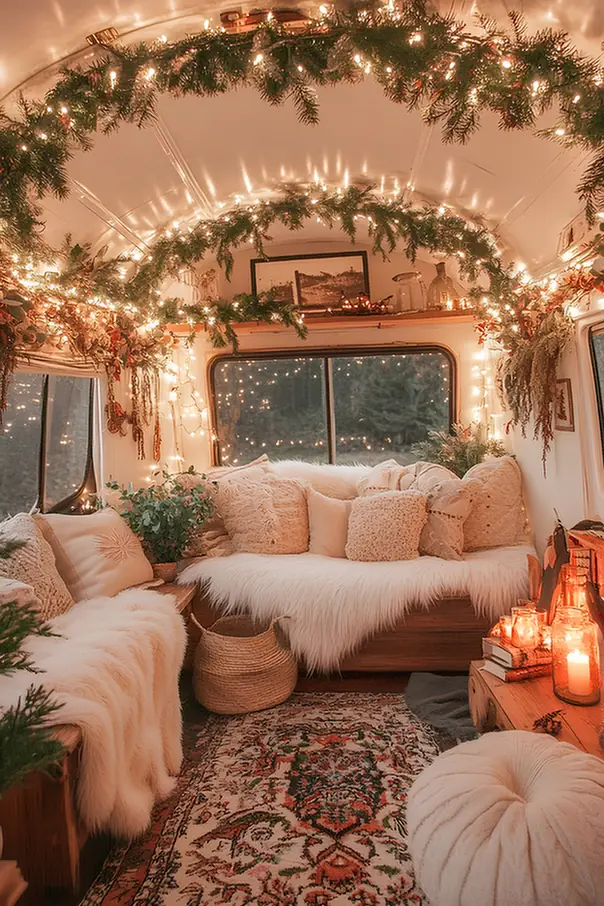
Most RV light setups treat the wire as the whole decoration.
Here, the wire disappears entirely. Faux pine garland wraps the ceiling curve from front to back, and the string lights get tucked inside the branches instead of run bare along the trim.
The effect reads less like a fixture and more like the light is simply coming from the greenery itself. Candles at table height back it up, so the whole nook glows from three different sources at three different heights without a single bulb ever being visible.
Worth knowing before copying this: faux garland sheds less than real, and it won’t dry out or become a fire risk near warm bulbs over a long trip.
11. Line Cabinets With Amber LED
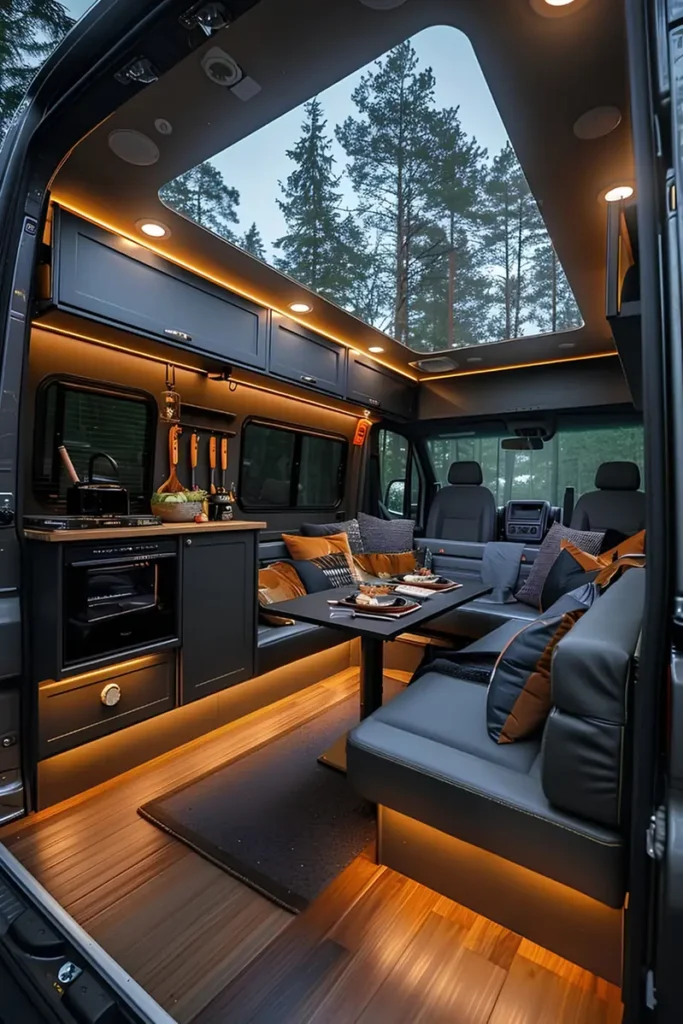
Dark cabinetry swallows light instead of bouncing it around.
That’s usually a problem. Here it becomes the whole design trick.
A thin amber LED strip traces the underside of the upper cabinets and wraps the base of the seating, cutting a bright line against all that matte black. The contrast does more visual work than a dozen small lamps ever could.
Recessed spots overhead handle general brightness, while the oversized skylight brings in daylight hours before any of it needs to switch on. One note if copying this near a skylight: strong sun exposure over time can loosen adhesive-backed strips, so screw-in channel mounts hold up better than stick-on tape long term.
matte black cabinetry
amber LED strip line
warm recessed spot accents
12. Flank Seating With Wall Sconces
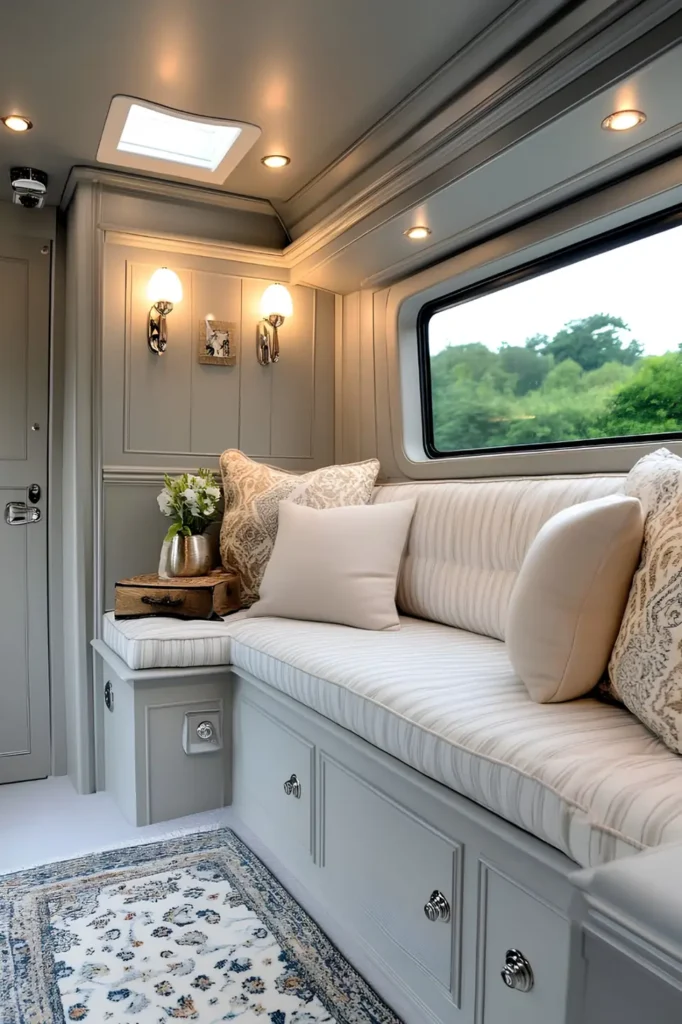
Paired lighting reads more formal than a single fixture ever will.
Here, two identical sconces frame a small nightstand vignette against the bench seat, spaced evenly like a headboard setup rather than a random accent. That symmetry is what makes the corner feel finished instead of just lit.
A few reasons this pairing works so well:
- Even light spread across the whole seating length, no dark end
- Frosted glass shades soften the bulb instead of exposing it
- Recessed cans above handle general brightness, leaving the sconces purely for mood
One thing to flag if copying this in a rental: sconces mounted straight into a wall aren’t reversible, so check hookup rules before drilling anything permanent.
13. Outline Every Step With LED Strips
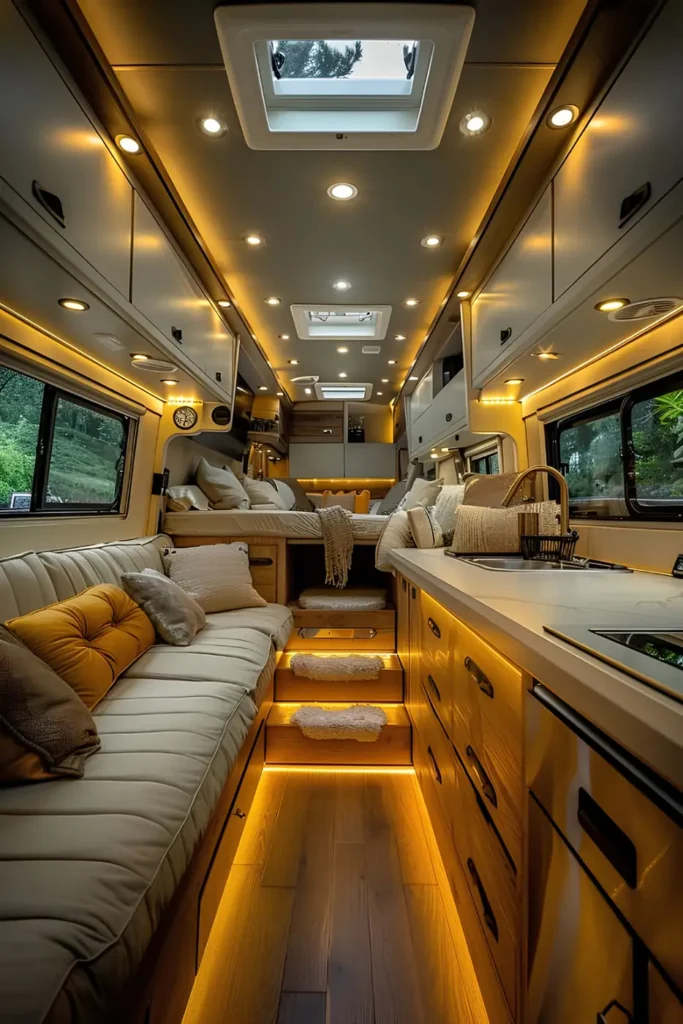
Steps inside a moving rig are a tripping hazard the moment the sun goes down.
This layout treats every single step edge as its own lighting zone. LED strips run the full length of each riser, glowing bright enough to mark the transition from lounge to bed area without a single overhead light needing to be on.
It’s a small move that solves a real annoyance:
- Steps become visible even in near-total darkness
- Nobody needs to grope for a switch mid-walk
- The warm tone matches the recessed ceiling lights instead of clashing with them
Worth knowing: LED strips on high-traffic step edges wear faster than ones tucked under a cabinet, so a protective clear channel cover extends how long they last on the road.
14. Give Every Zone Its Own Fixture
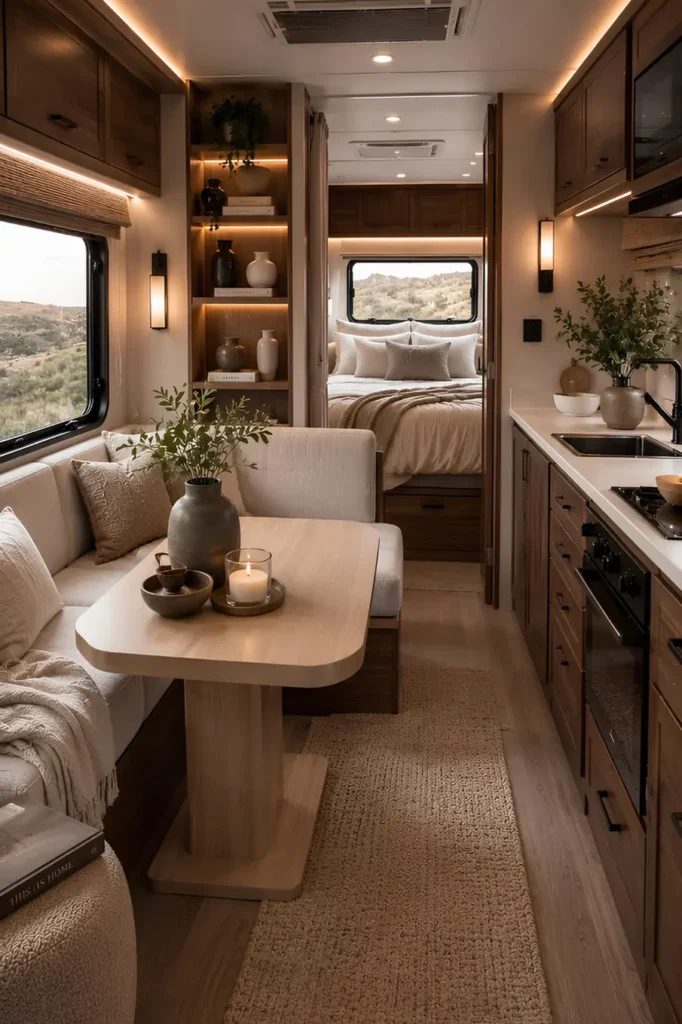
Cove lighting alone would flatten this whole space into one uniform glow.
Instead, each zone gets treated as its own lighting job. Warm cove light traces the ceiling edge from kitchen to bedroom. A slim wall sconce sits beside the built-in shelving for reading light. Under-cabinet strips handle the counter, and a separate warm bulb glows just inside the bedroom doorway.
Nothing here relies on one master switch to do everything. That matters most at night, when someone wants coffee without lighting up the whole rig for the person still sleeping.
| Zone | Job | Fixture |
|---|---|---|
| Dining nook | ambient glow | ceiling cove strip |
| Shelving corner | reading light | slim wall sconce |
| Kitchen counter | task light | under-cabinet strip |
| Bedroom doorway | low night glow | single warm bulb |
15. Backlight The Mirror, Skip The Vanity Bulb
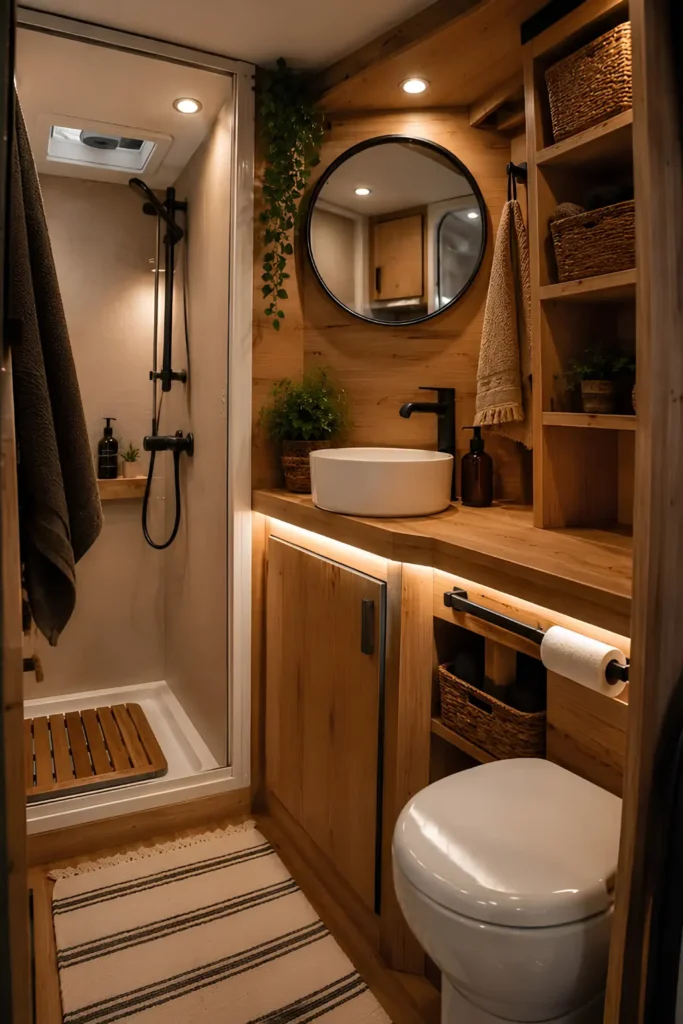
Why does this bathroom mirror glow instead of just reflect?
A small recessed spot sits angled just above the round mirror, throwing light down across the face without a traditional vanity strip mounted to the frame itself.
Underneath, a warm LED strip runs the length of the counter’s underside, which does two things at once. It marks the cabinet edge in low light, and it keeps the whole vanity from looking flat once the sun goes down.
The mirror itself stays plain and unlit. All the actual work happens above and below it instead.
Conclusion
Good RV lighting isn’t about adding more fixtures. It’s about matching light to the job, task light where hands are working, ambient glow where people are relaxing, and a low path light for the walk nobody wants to do with the overheads on.
Start with whichever zone in your own rig feels the darkest and work outward from there.
Save this roundup for your next travel day, and pin the ideas that fit your rig so they’re easy to find when you’re ready to install.
Light matched to the job beats light matched to the room every time.