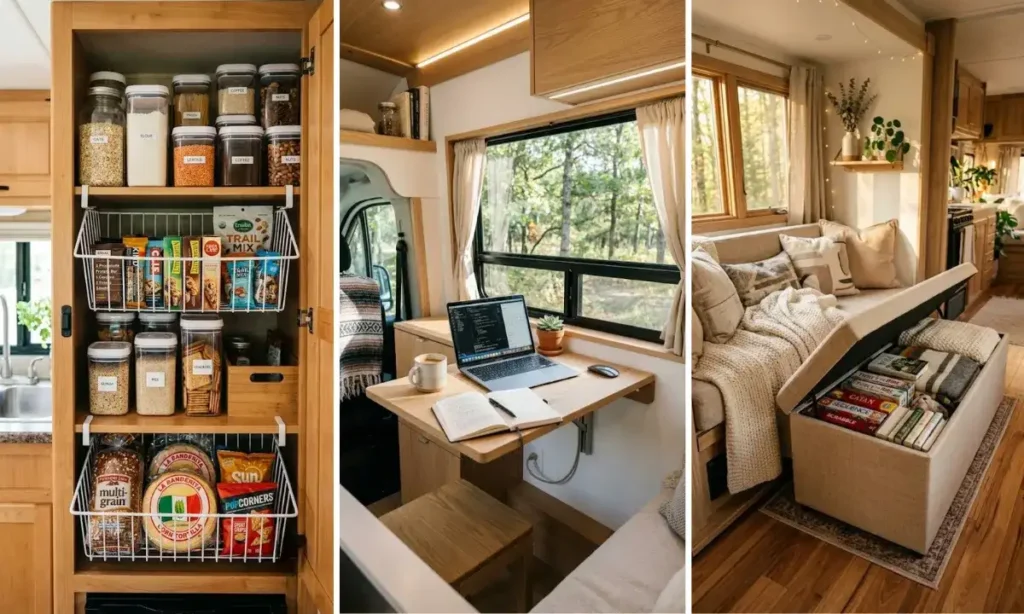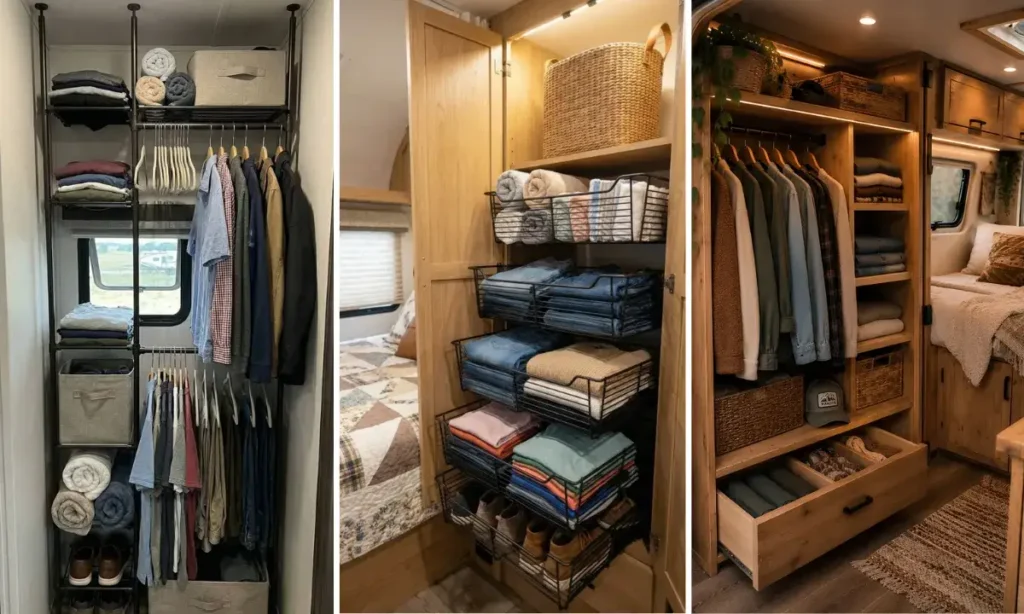
Anyone living in an RV knows the closet was an afterthought. It’s barely wide enough for a row of shirts, let alone a real wardrobe, and most factory shelving wastes half the space it does have.
That’s where a few smart RV closet organization ideas make the difference between a jammed, chaotic wardrobe and one that actually works for daily life on the road. Some of these fixes cost nothing beyond a little rearranging. Others mean adding pull-out baskets, tension rods, or a repurposed shoe organizer to squeeze more out of every inch.
A few are bigger projects, like turning the space under your bed into hidden storage. Whatever your setup, there’s a mix here of quick wins and weekend projects to make a shoebox-sized closet feel like it was actually designed for real clothes.
1. Double Up Your Hanging Rod
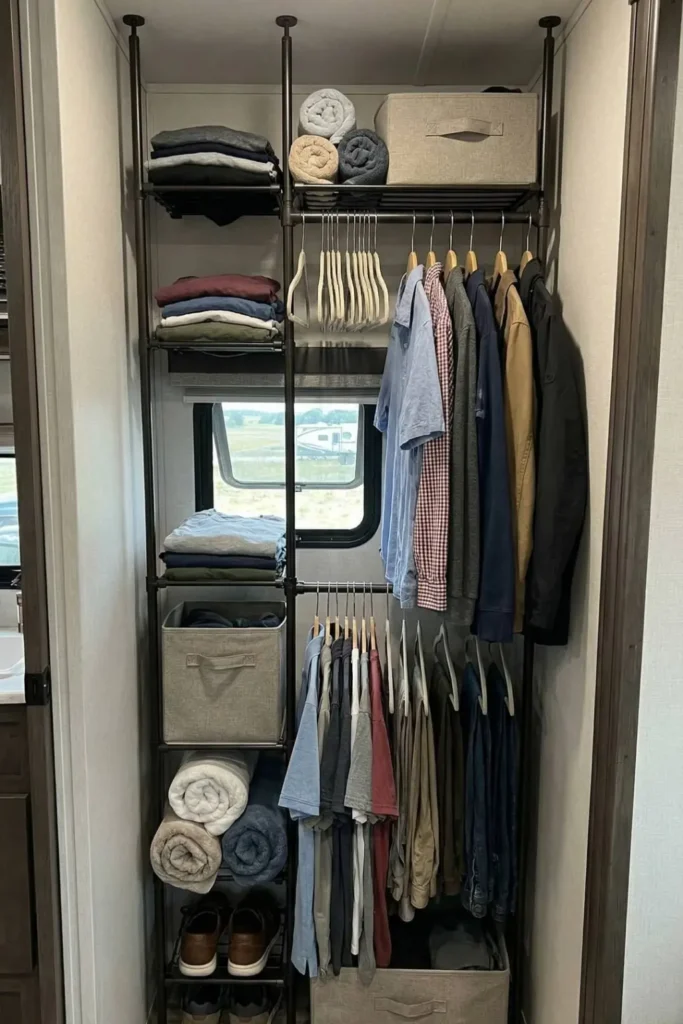
RV closets waste half their height on empty air above a single rod. Stacking a second rod below the first closes that gap fast, while a shelf tower along the other wall catches what doesn’t hang.
Nothing here gets drilled in. These pole systems wedge floor to ceiling on tension and hold their own weight, which matters in a rental or a rig you don’t want to put holes in.
The tradeoff: you lose a few inches of depth to the hardware, and stacked rods mean shorter items only. No maxi dresses on the bottom row. For a closet full of shirts and folded pants though, that’s a fair swap for doubling your hang space.
2. Hang Storage On The Door
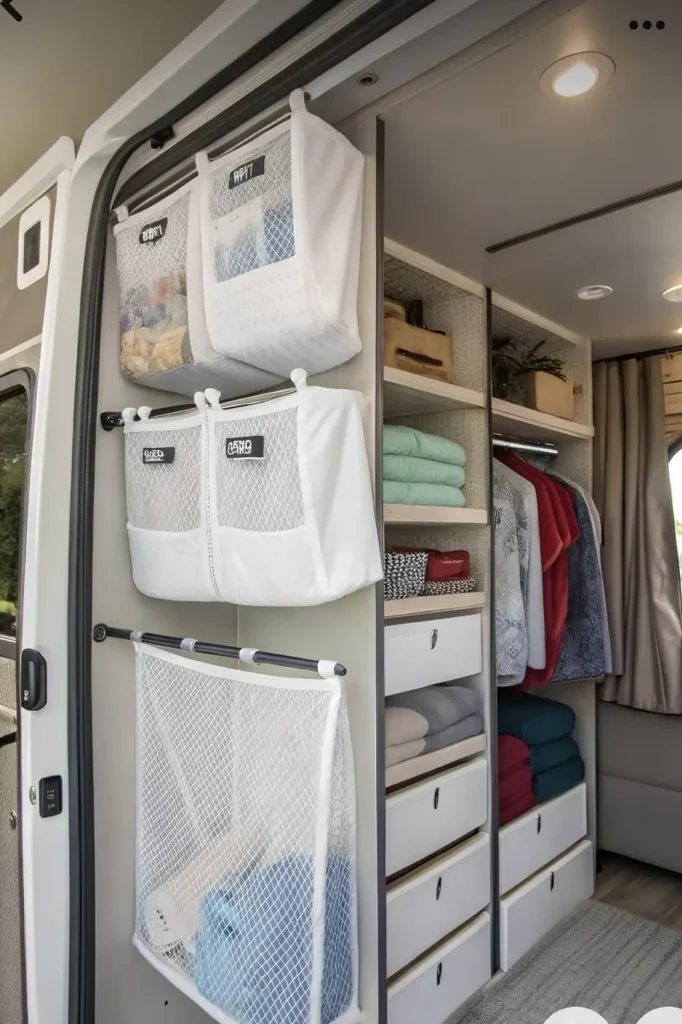
The back of a closet door usually sits empty in an RV, and that’s real square footage going to waste. Mesh over-door organizers turn it into extra storage without touching a single shelf inside.
Zip pockets keep small stuff sorted by category instead of dumped in one bin, and mesh lets damp towels or swimsuits actually dry instead of going musty in a sealed tub.
A short tension rod below adds a second spot for a hanging laundry bag, so dirty clothes never pile on the floor of a closet this size.
One thing to watch: these hang on the door hinge side, so measure swing clearance before loading them up. Overstuffed pockets can catch on the frame.
3. Repurpose A Shoe Organizer
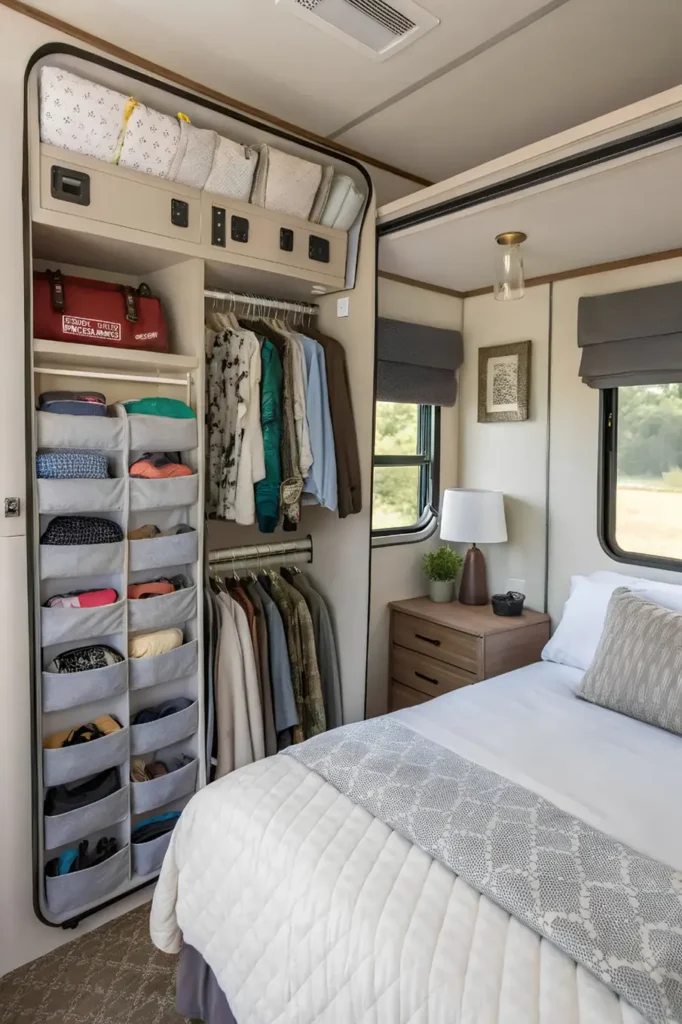
Most people save the hanging shoe organizer for actual shoes. Turn it sideways along the closet wall instead, and it becomes a sorting system for everything small that normally ends up loose on a shelf: socks, belts, jewelry, chargers, sunglasses.
Each pocket holds one category, so nothing gets buried under a pile of folded shirts. A quick glance tells you what’s where, no digging required.
Skip the shoes here. Canvas pockets sag under boot weight over time, so this trick works best for lightweight items only.
4. Swap Shelves For Pull-Out Baskets
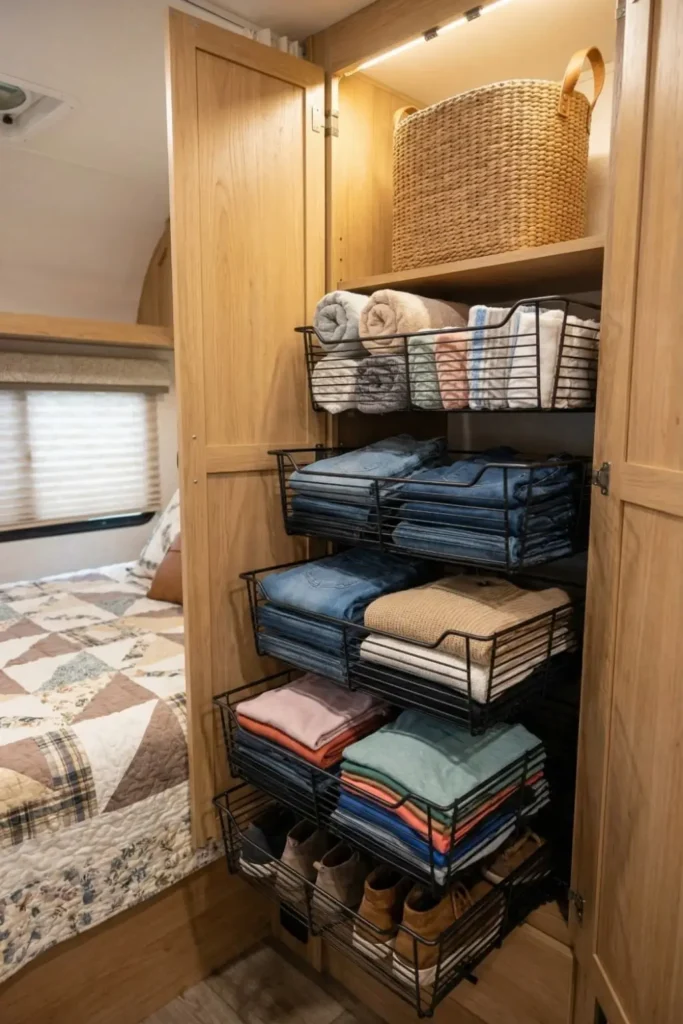
Fixed wood shelves force you to dig through everything on top just to reach what’s on the bottom. Wire pull-out baskets fix that by sliding forward, so you see the whole stack at once instead of only the top layer.
The open wire design means folded clothes stay visible and ventilated, which matters more in a closet with less airflow than a house has. Nothing sits pressed against solid wood collecting moisture.
Deep drawers near the floor take the heaviest stuff, jeans and shoes, while the lighter folded shirts sit higher up. That weight order keeps the whole unit from feeling top-heavy on the road.
Retrofitting basket drawers into an existing closet usually means a trip to a hardware store for slides and brackets, so this is more of a weekend project than a quick fix.
5. Give Shoes Their Own Cubby
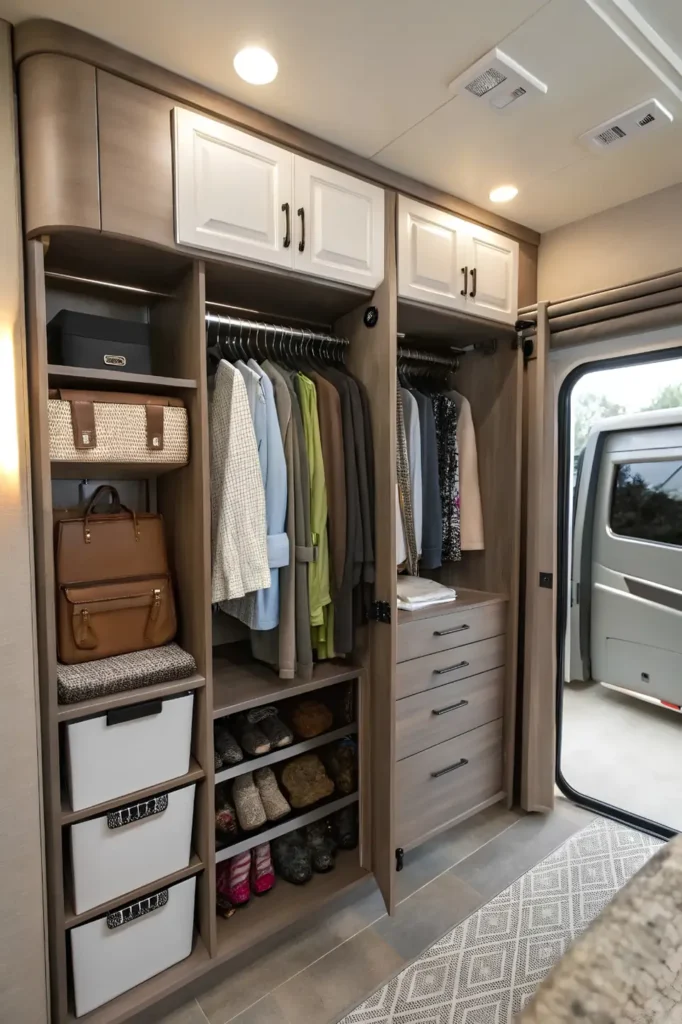
Loose shoes are the real culprit behind a messy RV closet floor. They roll, they tip, they eat up space that could hold something else.
Slotted wood cubbies solve it by giving each pair its own slot:
- One pair per cubby, standing upright
- Open front so you can see and grab without digging
- Sized to the shoe, not a generic bin that wastes height
Everything else in this closet gets zoned too. Hanging clothes down the middle, drawers on one side for folded items, open shelving up top for bags and bins.
Cutting cubby dividers to fit an existing closet takes real measuring and probably a saw, so this leans toward a weekend build rather than an afternoon fix.
| Zone | Job | Anchor piece |
|---|---|---|
| Floor cubbies | holds shoes upright | slotted wood dividers |
| Center hang bar | dresses and coats | full length rod |
| Side drawers | folded basics | stacked drawer bank |
6. Let The Bed Hold The Overflow
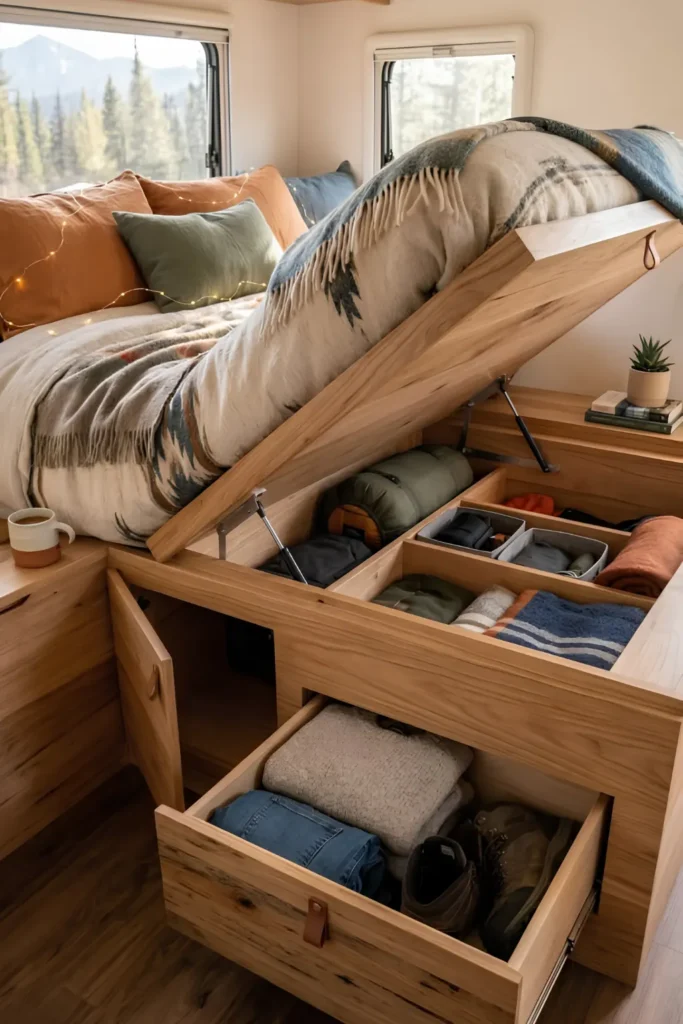
A shoebox closet can’t hold a whole wardrobe alone, and that’s fine. The mattress platform underneath has room most people never open up.
Gas struts lift the whole bed frame on hinges, turning the entire base into one deep storage bay. Below that, a slide-out drawer handles the stuff you need without lifting anything.
- Hinged lid section: bulky items like sleeping bags and off-season layers
- Slide-out drawer: folded jeans, sweaters, boots you grab daily
- Everything sits below the mattress, out of sight, out of the way
Building a lift-up platform bed from scratch means real carpentry, hinges rated for the weight, and gas struts sized correctly. This one’s for someone comfortable with tools, not a weekend beginner project.
⚠️ Watch Out
Gas struts need the right weight rating for a bulky mattress, or the lid won’t hold its position safely.
7. Zone Open Shelving With Cube Dividers
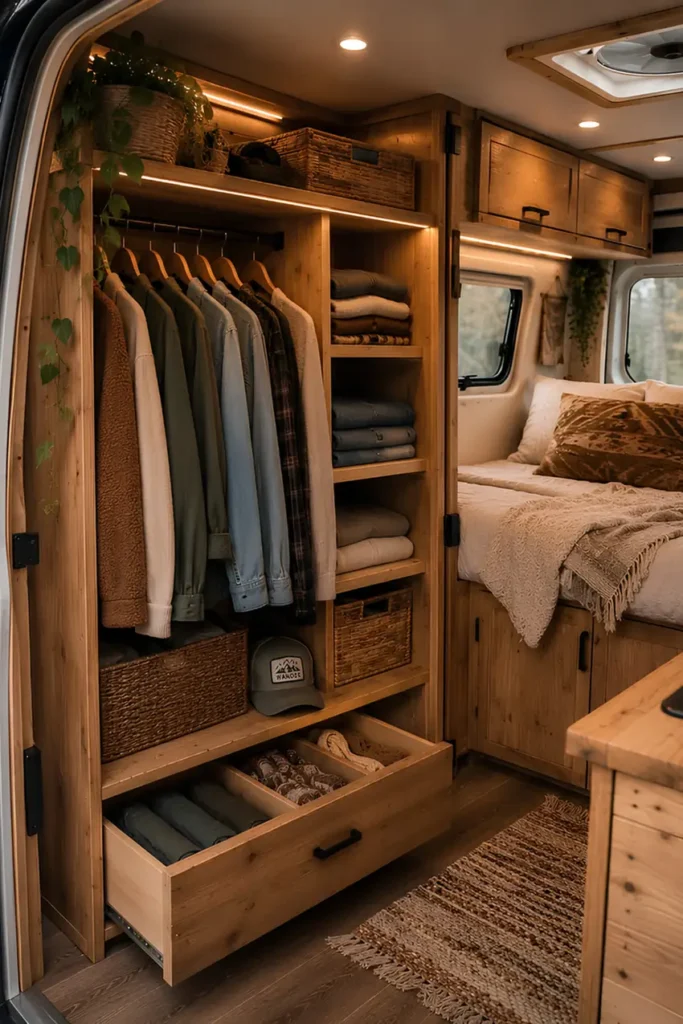
An open shelf without dividers turns into one big pile fast. Add wood cube inserts and every category gets its own square, so a stack of folded sweaters never tips over into the jeans next to it.
Woven baskets on the top shelf take the odds and ends that don’t fold neatly, caps, gloves, small bags, keeping them contained without a drawer.
Down at the bottom, a slide-out drawer with built-in dividers handles rolled socks and smaller folded pieces, separate from the open shelving above it.
- Open cube shelves: sweaters, jeans, folded layers
- Top basket: loose accessories and hats
- Bottom drawer: rolled items that need their own compartment
Open shelving with fixed cube sections.
Woven storage baskets for loose items.
A slide-out drawer with built-in divider slots.
Wood cube inserts sized to the shelf opening.
8. Stack Clear Bins Instead Of Opaque Ones
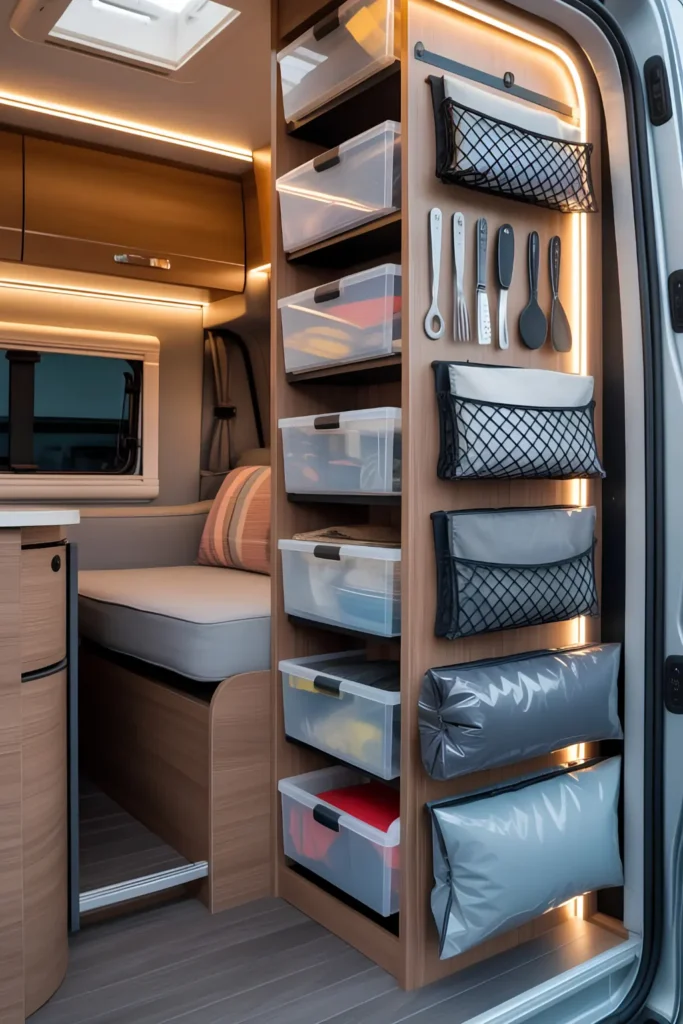
A closed cabinet with solid bins means opening every single one to find what you need. Swap in clear plastic bins and the guesswork disappears. You see contents through the side without touching a single lid.
This works best for items you don’t reach for daily: off-season layers, spare linens, gear you only need occasionally. Everyday clothes still want a hanging spot or an open shelf.
Mesh pockets and hanging pouches fill the narrow strip beside the bins, catching flat items like belts or scarves that would just slide around loose in a drawer.
Clear plastic does fade and go brittle with enough direct sun through a window, so keep this stack away from a spot that bakes all afternoon.
See it without opening it
9. Mount A Hook Rail On The Door Face
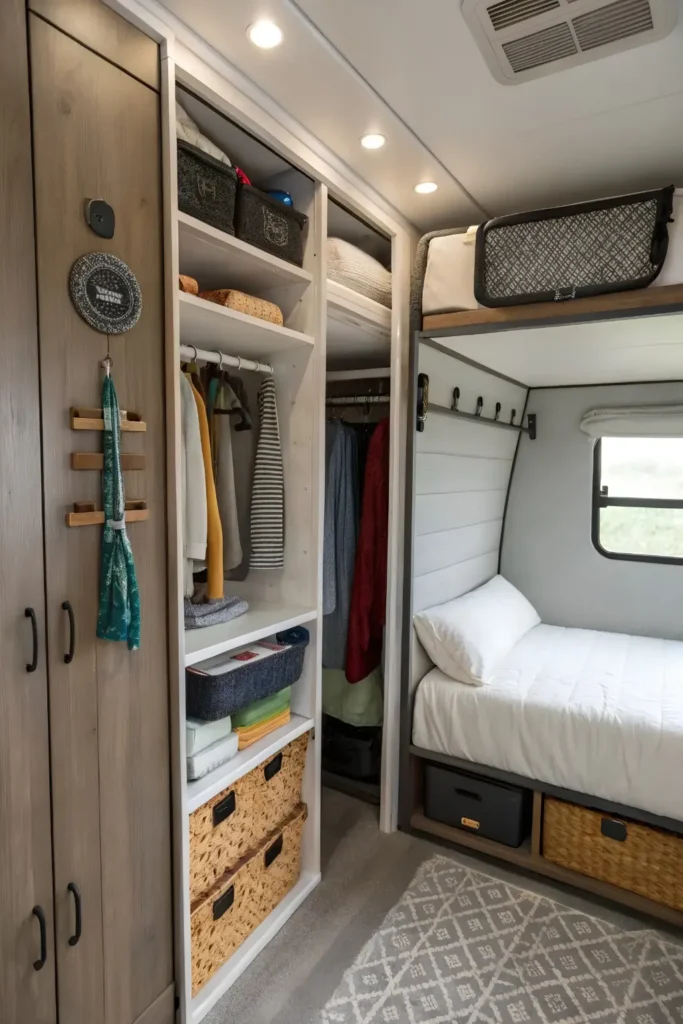
Every closet has one surface nobody uses: the outside face of the door itself. A slim wood hook rail turns it into a spot for scarves, belts, and anything you’d otherwise drape over a chair.
It’s a different kind of storage than a shelf or basket. Nothing gets folded or contained, items just hang in plain sight, which makes grab-and-go mornings faster.
Screw-mounted hooks need actual holes in the door, so this isn’t the move in a rental or a lease where the walls stay untouched. Adhesive hook strips are the workaround if drilling is off the table.
Down the hall, the same layering shows up again in miniature: open cubbies for folded basics, a slide-out drawer for socks, and woven bins tucked under a bunk bed for anything that doesn’t need daily access.
10. Turn Under-Bed Space Into A Dresser
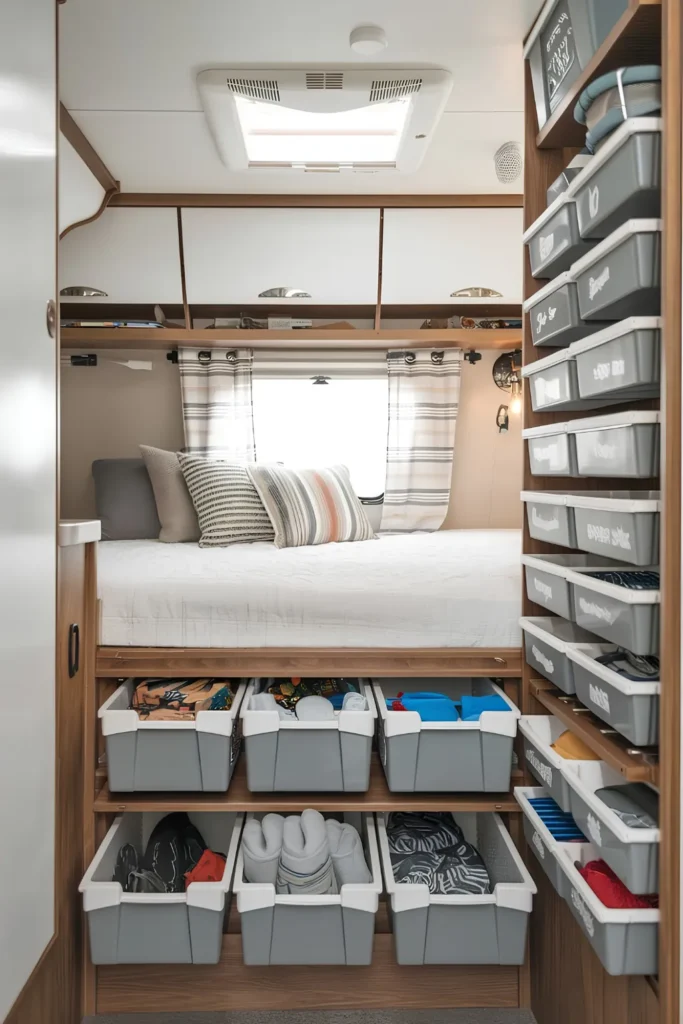
The space under a raised bed platform usually sits empty in an RV, holding nothing but dust. Slide-out plastic bins turn that gap into a full dresser without adding a single piece of furniture.
Labeled bin fronts mean everyone in the family knows exactly which drawer is theirs, no more digging through a shared pile to find the right shirt.
A matching tower of stackable bins runs floor to ceiling along the closet wall, one category per drawer: shorts in one, socks in another, folded shirts in a third.
Plastic bins handle humidity better than cardboard or fabric, so this setup holds up in a rig that sits somewhere damp for a stretch.
11. Hang A Fabric Shelf Unit
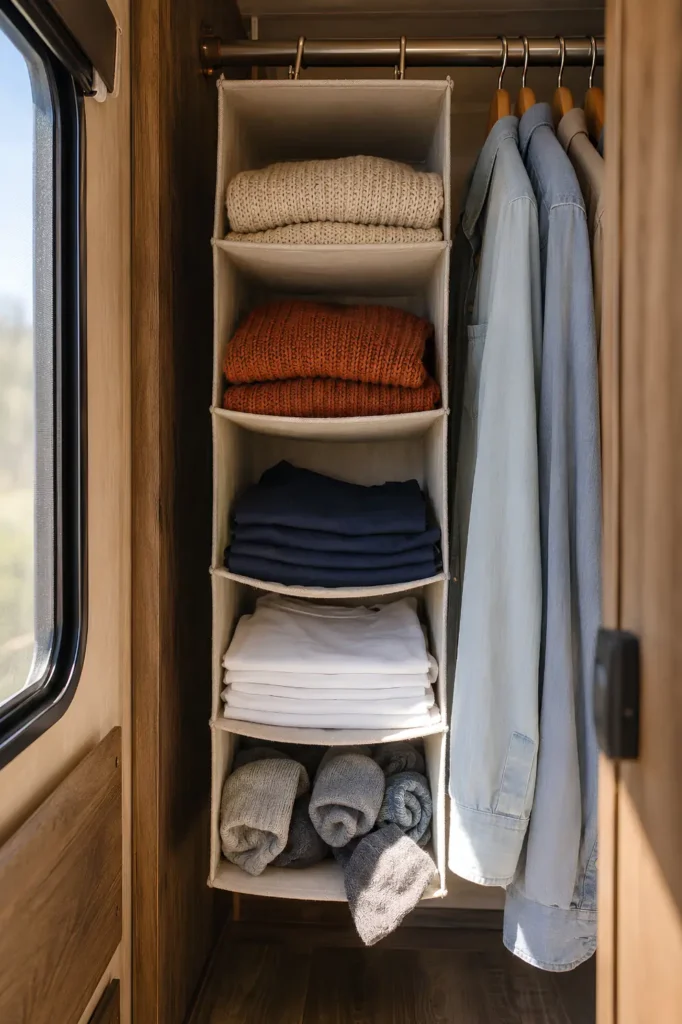
Most people assume the rod is only good for hanging clothes. Clip a fabric shelf organizer onto it instead, and that same rod suddenly holds six or seven cubbies of folded items too.
No drilling, no tools, no permanent changes. It clips straight onto existing rod hardware and comes right back down if you need the space for something else later.
What fits inside each tier:
- Top cubbies: folded sweaters and thicker layers
- Middle cubbies: t-shirts and everyday tops
- Bottom cubbies: rolled socks or smaller folded items
One thing to know before buying: fabric shelves sag a little under heavy sweaters over time, so this setup suits lighter folded items better than a stack of bulky flannel.
12. Switch To Slimline Hangers
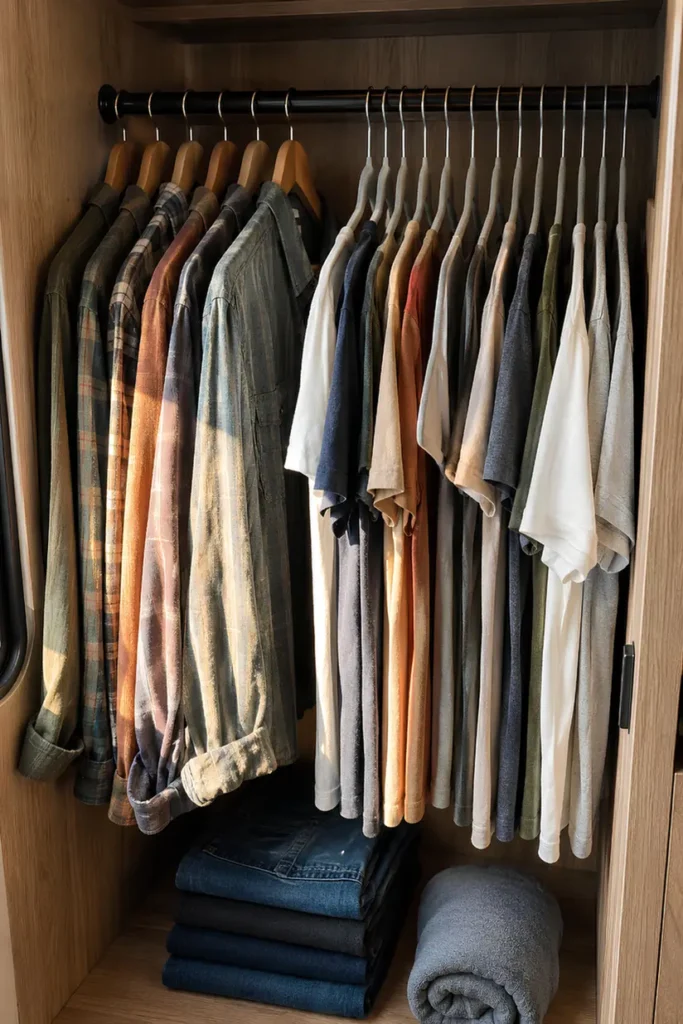
Bulky plastic or wood hangers eat up rod space fast, and in a closet this size, every extra half inch per hanger adds up to lost capacity.
Standard hangers: about a dozen shirts fit the rod before it’s packed solid, shoulders overlapping and fabric wrinkling against the next item.
Slimline velvet hangers: the same rod holds nearly double that count, with clean gaps between each shirt instead of a crammed row.
The catch is heavier coats and jackets need a sturdier hanger underneath. Velvet ones are built for shirts and blouses, not a winter parka.
💡 Quick Tip
Reserve two or three sturdy hangers for coats and jackets, and switch everything else to slimline.
13. Split A Shelf With A Tension Bar
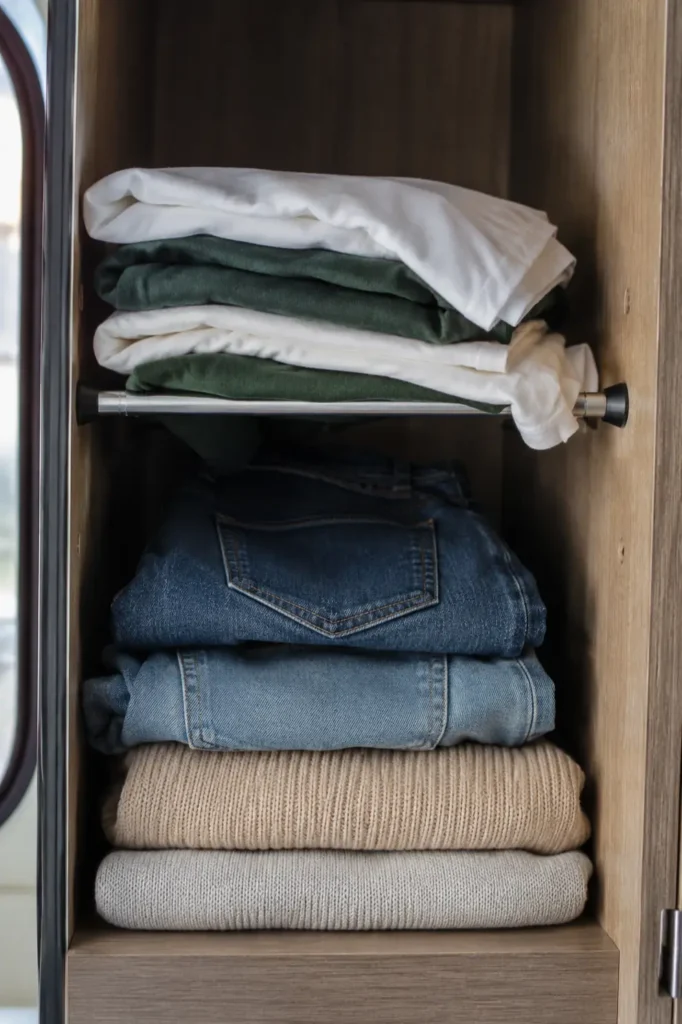
A single flat shelf wastes the empty air above a folded stack. Wedge a small tension rod horizontally partway up, and that same shelf holds two stacked rows instead of one.
- Bottom row: heavier folded items, jeans and sweaters
- Top row, resting on the tension bar: lighter folded shirts or tees
- No drilling, no brackets, the rod grips the shelf’s side walls on pressure alone
The catch: this only works on shelves with solid side walls to brace against. Open wire shelving without a lip on either end won’t hold the tension rod in place.
Lighter folded shirts, resting on the tension bar itself.
Heavier folded jeans and sweaters, holding the base weight.
14. Add A Pull-Down Valet Hook
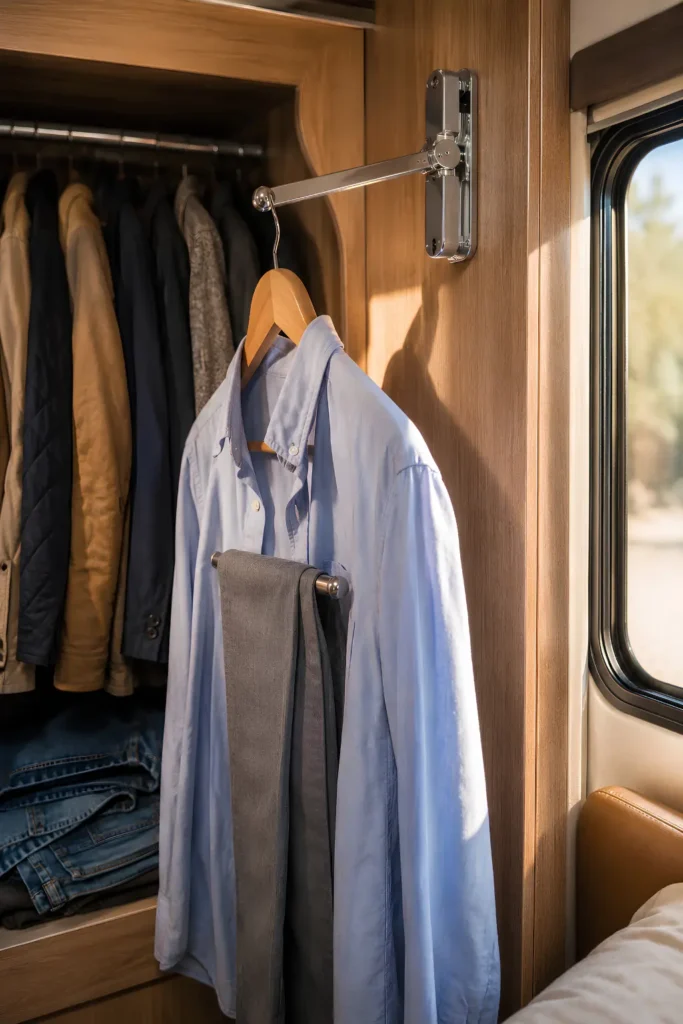
Laying out tomorrow’s outfit in a shoebox closet usually means draping it over the bed or a chair, since there’s no flat surface to work with inside the closet itself.
A pull-down valet hook mounts inside the closet frame and swings out only when you need it, holding a full outfit on one hanger while you finish packing or dressing.
- Mount the hook bracket to the closet’s side wall or door frame.
- Swing it out when prepping an outfit.
- Fold it flat against the wall when done, so it takes up zero space the rest of the day.
This one needs actual screws into the closet frame, so it’s a better fit for an owned rig than a rental unit.
✅ Screws directly into the closet frame, permanent mount.
✅ Folds flat when not in use, no daily clearance issue.
✖️ Not ideal for a leased or rented unit with no-drill terms.
15. Color-Code Hangers By Category
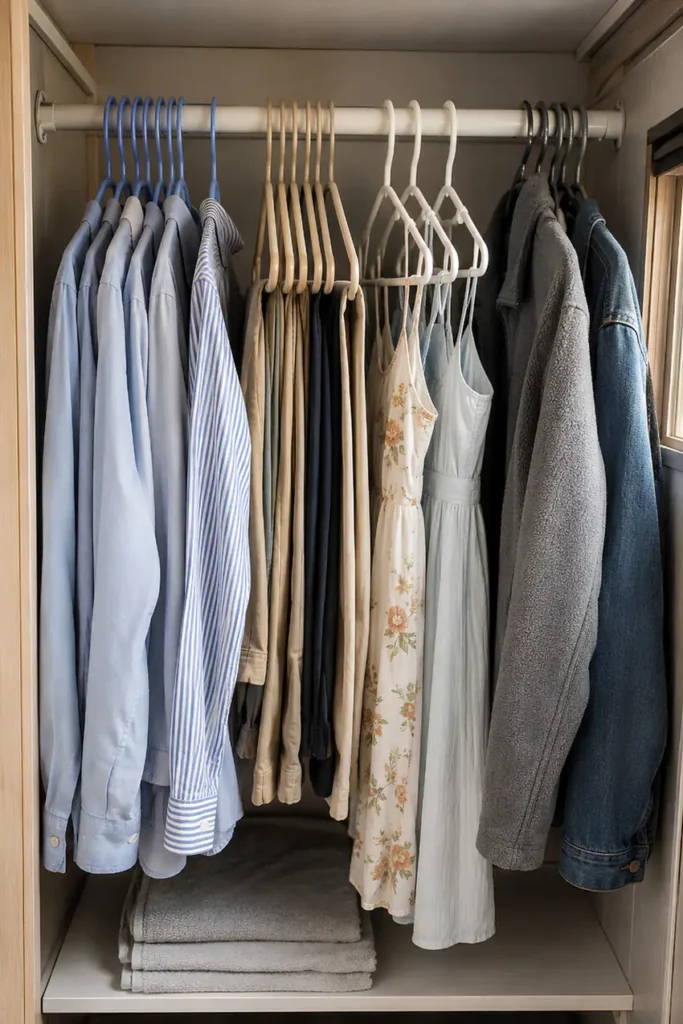
In a closet this small, digging past ten identical hangers to find one shirt wastes real time every morning. Assigning a color to each clothing category fixes that without adding a single piece of hardware.
- Pick four or five hanger colors and assign one per category: shirts, pants, dresses, layers.
- Group the closet by color instead of by item as you hang things back up.
- Glance at the rod and spot the right section instantly, no reading tags or checking sleeves.
This costs almost nothing since colored hangers run cheap in bulk packs, and it solves a real daily annoyance rather than just looking neat. The only real limit is closet width. With fewer than four color zones’ worth of rod space, the system feels more like clutter than help, so it works best once you’ve got at least a couple feet of hanging room to split up.
Conclusion
A tiny RV closet doesn’t have to mean living out of a suitcase. Between pull-out baskets, repurposed organizers, and a few smart hardware swaps, most of these ideas take an afternoon or less to try.
Start with whatever’s already bugging you most, whether that’s shoes piling on the floor or shirts crammed onto one crowded rod, and build from there.
Small changes add up fast in a space this size. Save this for your next RV project, and come back whenever the closet starts feeling cramped again.